2024_03_12_Hatsan_Edge_MG_Camo_Spring_Combo_22

A couple years back I picked up a few Hatsan Edge combos from Amazon when they were being sold on “clearance” for ~$56. These were NEW 22cal combos with scope & mounts and MuddyGirl camo stocks.

Performed some preliminary testing on them when received to verify nothing was “broken” and shelved them for future use.

NOW is the time for one of those rifles! Some friends recently moved into a new(old) home and they have expressed interest in learning about and shooting airguns.

They also have a serious woodchuck problem CLOSE to the house. With an Edge they may be able to cull the cheeky marmot problem… after SAFETY instructions and some serious target practice.

Yes, I am aware that woodchucks are TOUGH CRITTERS and I have heard MANY stories of them running off after being shot with a 22LR. I am talking about PRECISE fuse-box shots with a 18fpe 22cal springer at 30′ range or closer. THAT WILL drop them DRT. Body shots? No way!

I am going to tear-down one of these air rifles and make some changes before handing it off to the new owners.

Plan:

  • Verify clean bore.
  • Remove factory lube.
  • Deburr sharp edges.
  • Verify all seals are like-new.
  • Remove loose top hat and replace loose short factory plastic spring guide with max-length fitted steel spring guide.
  • Re-lube (sparsely) with Moly paste and Marine(tacky) grease.
  • Polish and adjust trigger parts (may need longer adjustment screw?).
  • Straighten painfully curvy trigger blade and install lighter trigger spring.
  • Print 50-100 pellets on 30′ range targets over a Chronograph.

When ready this “cheap” air rifle should be a pleasure to shoot and I should easily be able to get dime size 10-shot groups at 30′ using just the open sights.

Next step will be to teach the new owners about gun safety in general AND stress safety tips specifically for Break-Barrel spring piston air rifles. Then I’ll help them set up a SIMPLE and SAFE basement shooting lane for practice. After that it will be practice-practice-practice until they can also consistently shoot dimes at 30′.

I’m confident they will have fun target shooting this air rifle.

Dispatching pests “may” come later as they could decide to leave the pest problem to professionals. I understand that shooting pests is a personal choice and not something everyone is comfortable doing.

Results:

image1: Excellent grouping despite shooter error.

image2: Very consistent velocity numbers.

image3: Recovered shot pellet shows moderate skirt inflation with excellent rifling marks.

Shot cycle is a very solid single THUMP with no indication this is a coil spring rifle. Overall I’m VERY HAPPY with these results 🙂

Cheers!
mjb

2023_11_09_Hatsan_Mod125-177_Camo_Combo_Closeout

I am a big fan of Hatsan spring-piston break-barrel air rifles. IMO they are NOT top quality but are appropriately priced “bargain” air rifles. Sometimes there is sloppy factory assembly, occasionally some broken parts, and in general mediocre quality control. Yet I’m STILL a Hatsan FAN 😉

I don’t recommend anyone NEW to air rifles start with a Hatsan, but for anyone WANTING a bargain air rifle that responds VERY WELL to a little home repair/tuning effort these rifles are ideal.

I’ve had a couple of their MAGNUM SPRINGERS in 177 caliber for a few years. Mod125, Mod135, and Torpedo155 are all nice rifles NOW after a little work. The 177 is NOT a good caliber for these rifles. The potential Muzzle Energy in the LARGER calibers is up to 34 fpe but I’ve never been able to get any of these rifles above ~27 fpe ME in the 177 caliber. I believe the large powerplant just cannot BREATHE fully with the small bore/pellets. I had promised myself that I would NOT buy another one of these MAGNUM springers in 177 caliber.

For several reasons I BROKE that promise a couple weeks ago when Hatsan had a CLOSEOUT sale on NEW Mod125-Spring-Camo-Combos (scope & mounts included) for $110 with a free shipping coupon. One reason was to SEE if there were any design changes. Another reason was because at that price it was worth getting one “just for the parts”! Third and final reason was I simply wanted another “project” rifle to satisfy my AG addiction 😉

NONE of my Magnums has a scope mounted and I don’t think the included scope would survive for long with the large recoils this rifle produces. Scope and mounts will be saved for some OTHER rifle that won’t shake it to death.

I received the rifle on 11/09/2023. Brand NEW box, shipped straight from Hatsan USA, in absolutely the BEST condition I’ve ever received a Hatsan rifle. All the (weak) styrofoam blocks were INTACT! That is a big first time for me because all previous rifles arrived with the styrofoam blocks pulverized into small beads. This rifle was also still sealed in a poly bag. FACTORY FRESH was my first thought… but I was only half right !

There were some recent questions/complaints on the GTA forum about NEWER Hatsan springers arriving with modified transfer ports.

2023/09/26 https://www.gatewaytoairguns.org/GTA/index.php?topic=210458.msg156478811#msg156478811
2023/09/30 https://www.gatewaytoairguns.org/GTA/index.php?topic=210536.msg156479657#msg156479657
2023/10/12 https://www.gatewaytoairguns.org/GTA/index.php?topic=210711.msg156482010#msg156482010
2023/10/21 https://www.gatewaytoairguns.org/GTA/index.php?topic=210860.msg156483692#msg156483692

In general this modified transfer port seems like it could be useful for anyone interested in experimenting with different transfer port sizes. Making a series of threaded inserts would allow such testing.

I’m comfortable with the old style Hatsan transfer port dimensions and have no current desire to perform TP experiments. I’m fairly certain the simple (drilled, not threaded with an insert) 4mm dia x 11mm long transfer port on my other Mod125 rifles is a “best compromise” for that powerplant in all the calibers offered (177, 22, 25).

NOT MY rifle… this transfer port with the threaded insert doesn’t look too badly damaged to me but the damaged hole for the lockup-wedge looks pretty horrible.
2023/10/13
https://www.gatewaytoairguns.org/GTA/index.php?topic=210458.msg156482223#msg156482223
https://www.gatewaytoairguns.org/GTA/index.php?topic=210458.msg156482222#msg156482222
I suspect that the rifle in these 2 posts may be a “customer HACK return” that didn’t properly go back through the Hatsan refurb process?

The only issue out-of-the-box for my rifle was the date of manufacture. If I’m interpreting correctly the numbers 0514 most likely mean the rifle was made in May 2014. So I got a brand new OLD STOCK rifle. That scraps my hope to examine a recently made Hatsan with the modified transfer port.

I can confirm that this rifle has the simple transfer port hole 4mm dia x 11mm long.

First step for me is cleaning the bore. One wet patch came out very clean followed by 2 dry patches to clear out the solvent (I use WD40). Checked tightness of the SAS bolt and stock screw… all good.

I KNOW this rifle can send pellets with a very LOUD BULLWHIP SUPERSONIC CRACK so the first 10 pellets went point blank (~1″) into a deep cardboard trap. No data. That dieseled out some factory lube and the short distance prevented the LOUD supersonic crack from forming which saved my hearing. LOTS of SMOKE and acrid burning odor as expected from the factory “rust prevention” lubrication.

Next 10 pellets were right over the chronograph for a Muzzle Velocity baseline. The 7.9 grain CPHP averaged 1220 fps MV (~26fpe ME). Still LOUD and smoking but I can tell the dieseling is slowly fading. During those shots the rifle was held at arms length but I could sense a REALLY HARSH shot cycle with TONS of spring “twang” (spring vibrations) lingering after each shot.

I dropped back to 30′ and began a baseline accuracy test. I chose to use some of my older Winchester HP pellets from the yellow-print tins. These are the no-longer-available 9.7 grain pellets.

Image of Chronograph results (@30') and group size...

Rifle was still smoking and shot cycle was HARSH. With the rifle properly shouldered I was surprised at how well the hollow stock amplified the shot noise and spring vibrations right into my cheek & ear! Yikes!

That’s ENOUGH! Time to go inside and make this rifle shoot to its FULL POTENTIAL.

Removed stock and strapped the action with barrel onto my spring compressor.

Images of disassembly...

Removed endcap stud and anti-beartrap-link. Used short dummy pin to replace main latch pin in the Quattro trigger group. Disconnected the safety lever link and pushed out two front endcap cross-pins. This allows the Quattro trigger group assembly to be gently pried out INTACT. No need to disassemble the Quattro trigger group.

With a little force from the spring compressor the single remaining cross-pin holding everything together was easily pushed out. Relaxing the spring pressure showed the preload on this giant spring is 3″!

Cleaned out the factory grease (& swarf), deburred comp tube, relubed (sparse application of my favorite moly and marine grease), and installed NEW CUSTOM spring guide.

Image of spring, old guide, new guide, and endcap,..

For reference THIS rifle contained a coil spring that has 44 active coils, 0.840″ OD, and 0.142″ wire. I have previously measured these springs with 42 active coils. I can’t confirm if this is an actual change or my previous coil counts were in error. Transfer port is confirmed to be simple drill hole 4mm dia x 11mm length. Piston seal is the “hard white polymer” version as expected and was surprisingly NOT damaged during factory assembly. I kept that seal in place. No need to change it.

I reassembled the action and went to work on that hollow stock TWANG AMPLIFIER. I removed the rubber butt pad (2 screws) and then the stock endcap (2 more screws). Filled the hollow cavity with heavy weight poly beads (blanket weights) and added a poly-foam plug carved from Pyramid pellet packing. Reassembled the stock. MUCH BETTER! Stock now feels SOLID.

Fired a couple shots point-blank into a cardboard trap to clear (burn-off) any of my new lube that got in front of the piston seal. Surprisingly NO more smoke! Dropped back to 30′ for some more testing. Right away the shot cycle was MUCH IMPROVED. Still has significant recoil but the shot cycle is now a single large THUMP! No more spring vibrations felt or HEARD from the stock to my ear.

Image of chronograph results (@30') and group size...

The 2 lower-left shots were during sight-in adjustment of the open sights. The remaining 8 shots went into a nice group. The rifle did loose some velocity/energy when shooting the Winchester HP 9.7 grain pellets. Some loss due to LESS dieseling certainly. Also some loss due to new longer snug fitting spring guide. However, I can now actually ENJOY shooting this rifle without wincing in anticipation of a painful and loud shot.

The chronograph data is shown below.

Image of chronograph data tabulated ...

There is something odd going on with this rifle using the OLD heavier Winchester HP 9.7 grain pellets. The pellet energy at 30′ seems too low. The NEW lighter Winchester 7.8 grain Round Nose pellets have the muzzle velocity and energy I expected from this rifle. Maybe this rifle simply does not LIKE the Winchester HP 9.7 grain pellets? I’ll need to run some more chronograph tests. Will update results as dated edits at the end of this post.

FWIW the Quattro trigger came with screws fully seated. I have NOT made any changes to the trigger yet. It is actually pretty-darn-good-as-is and I may choose to NOT make any trigger adjustments.

Note: There is a microfine crack just starting to form through one of the SAS holes in the plastic stock. I’ve heard several complaints about this on the CAMO stocks but have never seen it on any of my plain black stocks. IMO Hatsan has not considered the added thickness of the CAMO layer and how it may affect the SAS bolt/washer fit. I think the SAS bolt/washer fit is TOO TIGHT with the CAMO layer added and the increased stress on the stock holes has created a fracture forming through those holes. IF I’m right that might explain why I read more complaints about broken CAMO stocks.

Since my rifle is NEW I will contact Hatsan about possibly sending me another stock under warranty. I’d accept another CAMO stock but I’d drill out the interference layer (like I did on this stock) before assembly. A plain black stock would be acceptable as well since I don’t really need CAMO stocks on my air rifles.

mjb 🙂

2023_02_18_Hatsan_Mod95_Vortex_to_Coil_Spring_Conversion

20230218_085456e.jpg

First image is my Mod95 Vortex air spring, obviously it has lost all its air AGAIN (3rd time?), and the actual Mod95 piston.

Looking at the Vortex Type 1 you can see the bleed screw, cross-pin hole, and near the top the fill port hole.

Note the CRACK running down the middle of the milled cocking slot in the piston ?! That was not there last time I worked on this rifle.

20230218_085529e.jpg

Next image is same piston but other side of Vortex. That is a better view of the larger fill port hole and the smaller cross-pin hole. The text on this Vortex says “Maximum Muzzle Velocity at 125 Bar” and “Do not fill more than 160 Bar. I experimented with 150 Bar awhile back and it was WAY TOO MUCH PRESSURE for this rifle. Back to 125 Bar and it was a JOY to shoot. Mid to high 700fps for 14.3 grain CPHP and better accuracy than the shooter (me;-)

I was getting ready to TIG weld the crack in the piston and resurface/polish the cocking slot. That is when I noticed how THIN the metal was at the center of this slot. Seemed to be 0.005″ which may be why it split. My TIG welding is fair but if I had attempted to weld this crack it would have been an ugly mess!

I chose to grind out a channel instead, back to unfractured metal, and deburr the edges. Smoothed up the result and tested how the cocking shoe “rode” the modified piston slot. Nicely smooth! I’m deciding this is good enough.

MANY other springer pistons have the slot milled all the way through so you can see the spring coils inside so I don’t believe this has significantly weakened the piston. Only a tiny amount of mass was removed so the modified piston should not affect the rifle performance in any measurable way.

20230218_103227e.jpg

Next image shows the stock factory Mod95 spring I ordered. Also one of the 3 hole endcaps designed for coil spring models. The stock spring guide, which I don’t plan to use, is from another Mod95. It is too short and too loose a fit to work as a proper spring guide. Last is my custom spring guide made from a steel bolt. I added a slippery polymer washer and a hard steel washer, along with a little moly paste, to make a “thrust bearing” so the spring can wind-up (rotate) and relax during the cocking/shot cycle with minimal friction.

20230218_103646e.jpg

Image of the parts with the modified slot piston. So far an ideal fit as planned.

20230218_103434e.jpg

Here I’ve added the dead Vortex with its specific endcap as a comparison to the coil spring and its specific endcap. The “coil spring” endcap is NEEDED for this conversion. IMO the coil spring endcap is also needed for NP conversions. An NP conversion will need an additional custom bushing for centering and proper preload, but that is a fairly simple part which can be fabricated with basic home power tools.

https://www.gatewaytoairguns.org/GTA/index.php?topic=196304.msg156286955#msg156286955

Will reassemble the Mod95 using parts shown, along with my favorite lubrication process, and begin testing velocity and accuracy grouping after a 20-50 shot break-in period. May simply add that data to this post or start a new post as a part “b”.

mjb 🙂

UPDATES 02/18/2023:

First chronograph table data taken June 12, 2022 after Vortex leaked to “0” and was then restored to 125Bar.

Second data table is from today 02/18/2023 after converting Mod95 to a coil spring with custom spring guide.

All is working well so far.

mjb 🙂

2021_12_12_Winchester-Daisy-1100ss

Winchester/Daisy 1100ss Break-Barrel Air Rifle ( first draft, no images)

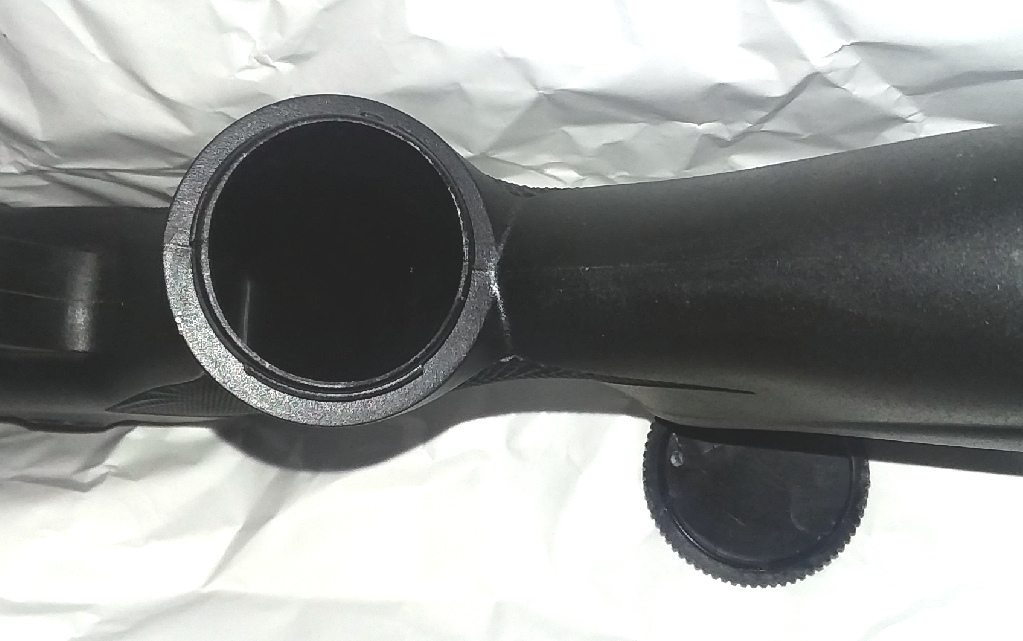
Not quite what I would call a magnum springer, but certainly an adult sized air rifle shooting in the 16 fpe range right out of the box. I define magnum springers as starting around 22 fpe and up. What I’ll be discussing today is one of my $29 1100ss versions from ~2019 Amazon clearance that had factory stock internals and some trigger mods shown here…

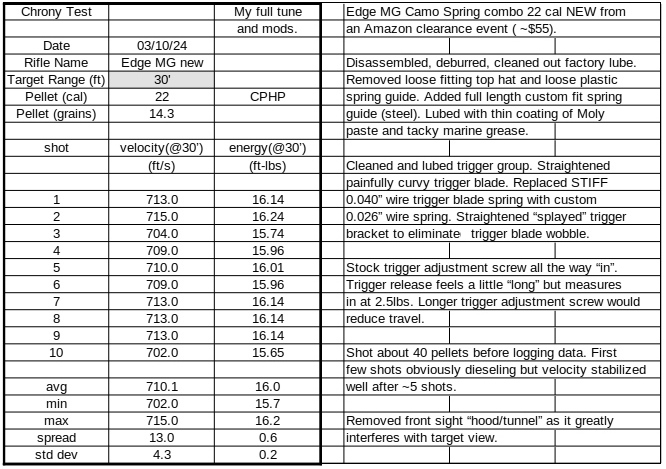
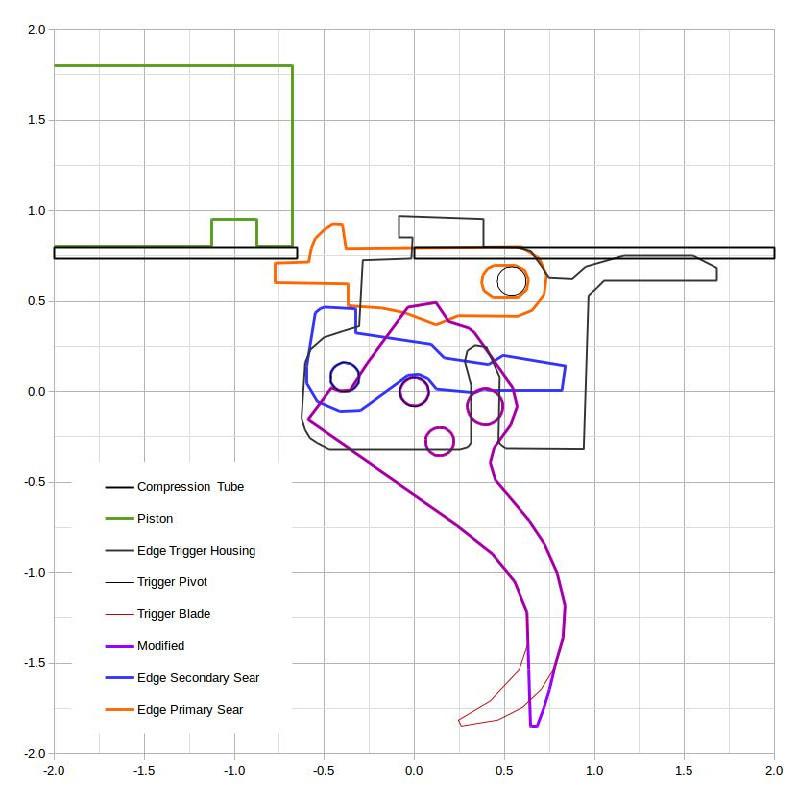
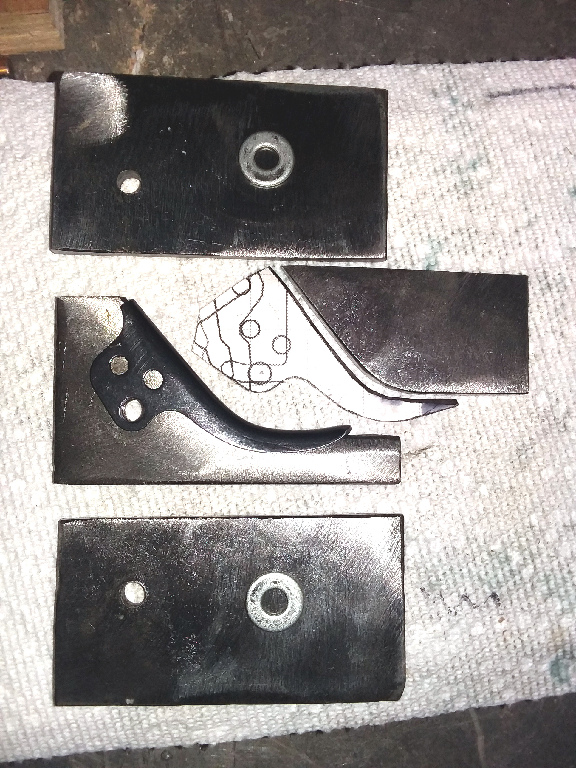
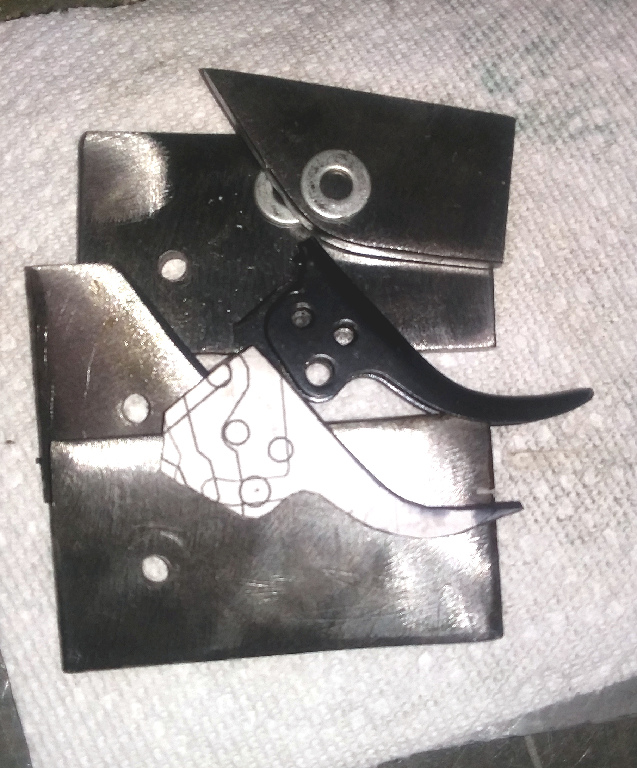
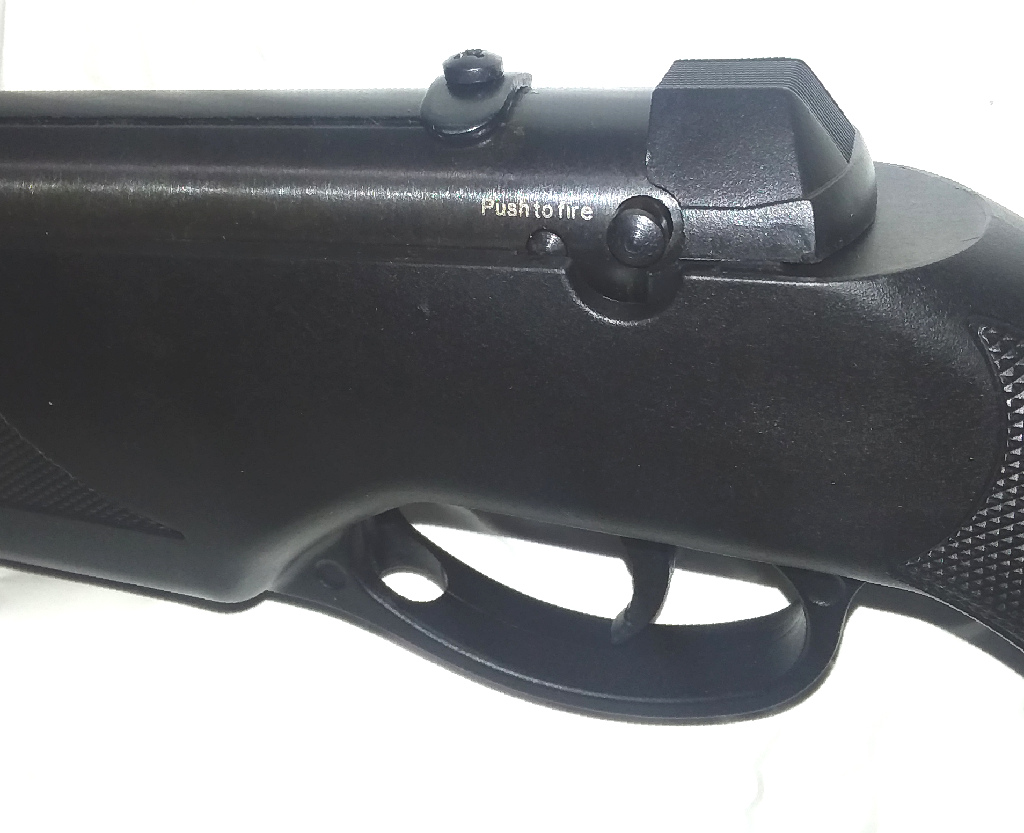
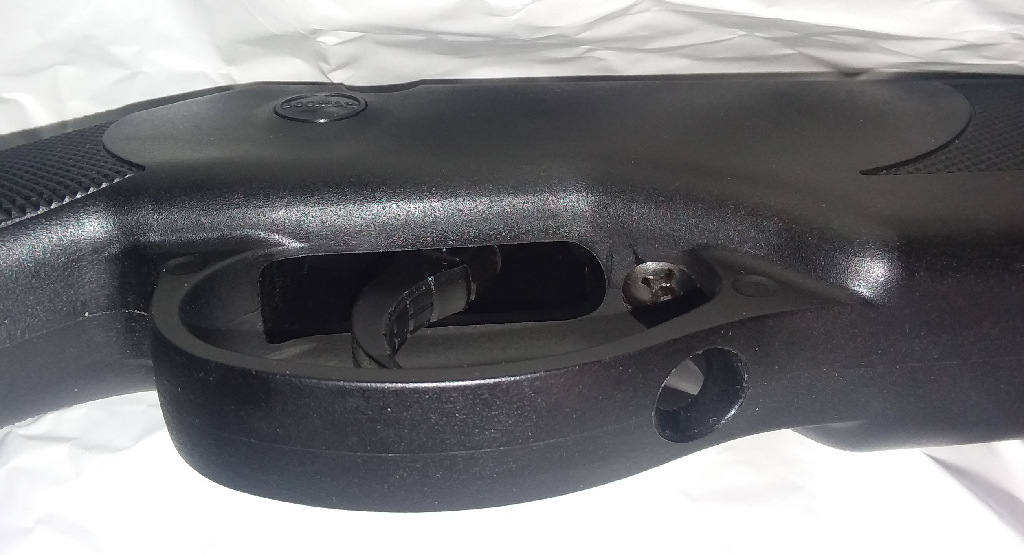
Winchester/Daisy 1100ss Trigger Mods

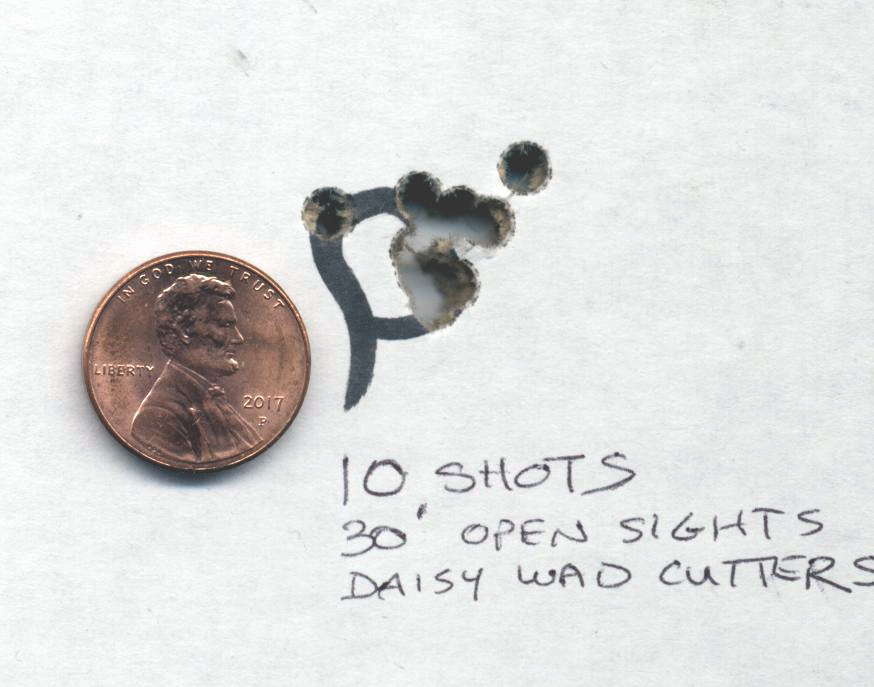
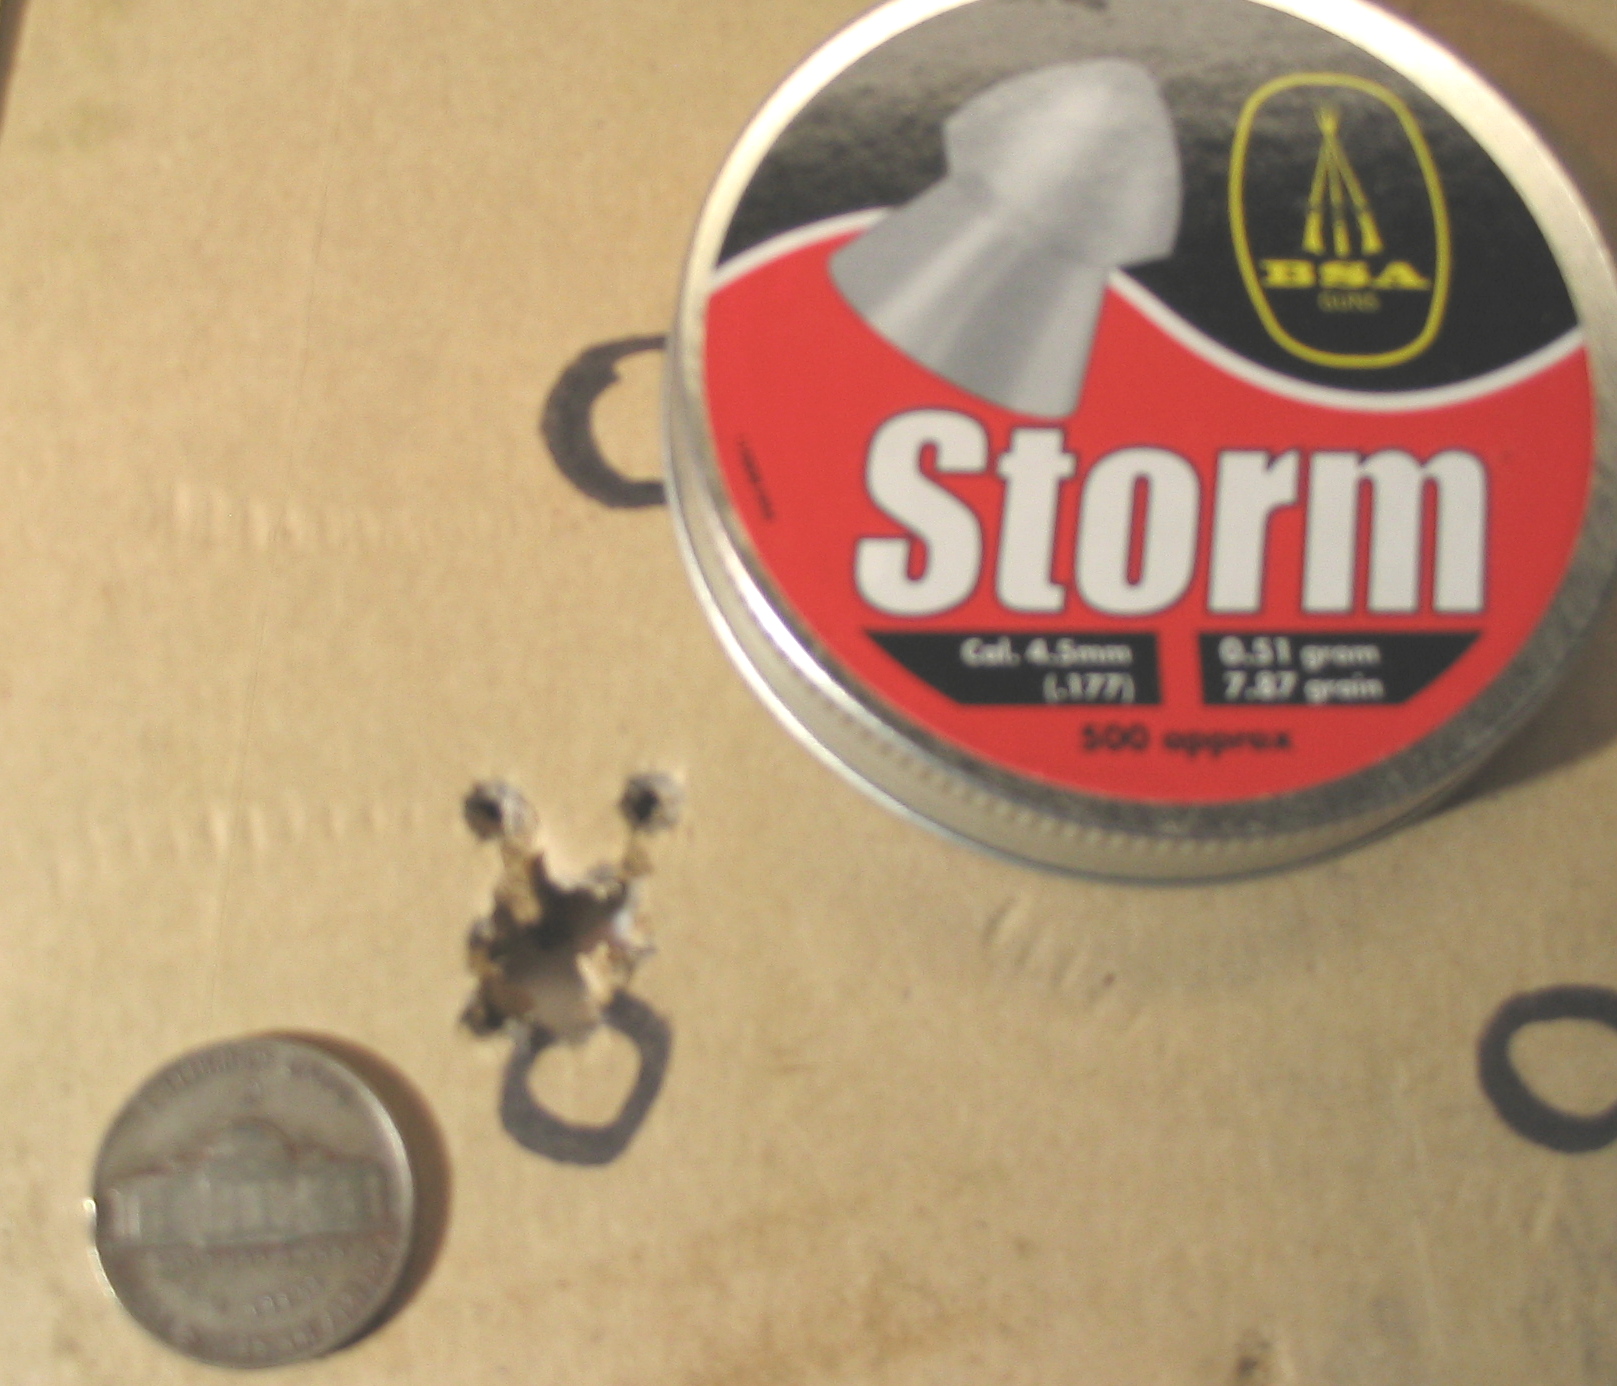
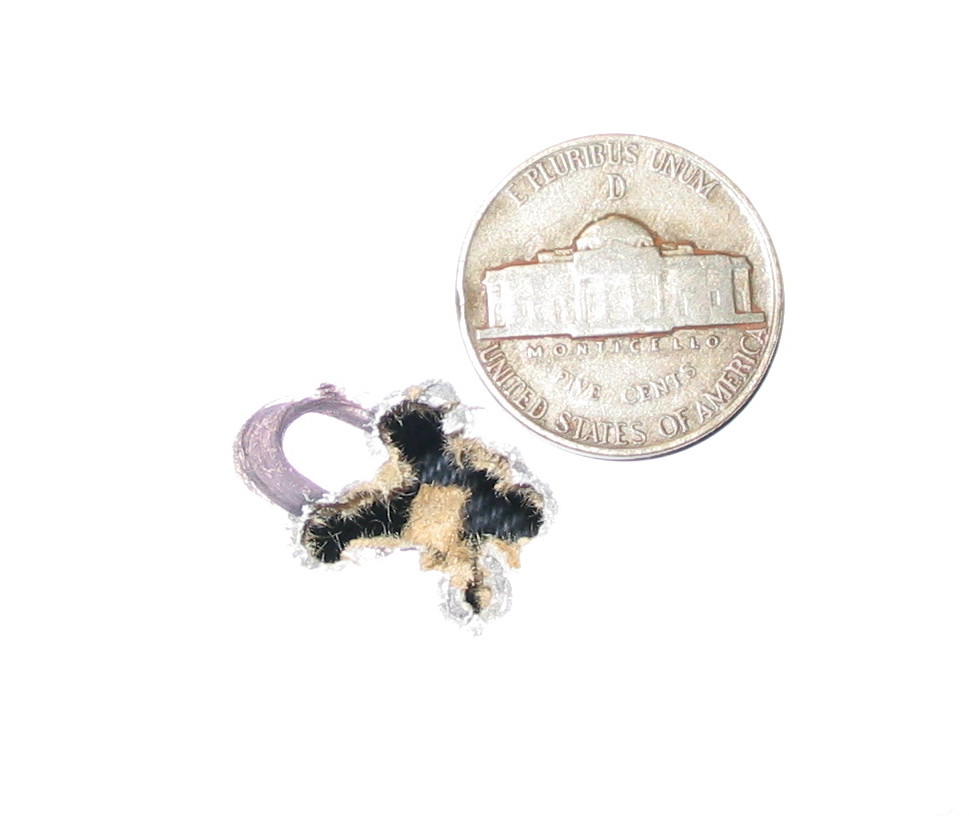
IMO the rifle shoots well and (with the trigger mods) I can get shockingly consistent 3/8″ 10-shot groups at 30′ with the open sights. For me and my dozens of other springers this accuracy/consistency ranks in the top 5. Considering the $29 cost of the rifle I was impressed. I am still impressed after a recent shooting session with the same results. My very first 1100ss was a $63 one from a local Walmart and that rifle (with trigger mods) is also shooting the same way. IMO a bargain at $63 and a steal at $25.

I don’t feel the cocking cycle or the shot cycle is anything other than “normal” for this category of springer. Typical action noise dominates the shot cycle. I’d rate the polymer stock as BETTER than average without any hollow resonances I frequently find in cheap springers.

Muzzle report is also typical. Obviously anything supersonic (from dieseling factory lube) will be LOUD, but this should subside after a few shots. Any slight crunchiness near the end of the cocking stroke is usually due to the anti-bear-trap and safety reset linkage. I feel this on several budget springers and don’t consider it a problem.

There was one comment about sharp edges on the front sight making the cocking cycle uncomfortable. I AGREE! Something to investigate at a later date.

There has been some discussion of ways to modify this rifle so it is easier to shoot. Removing the top-hat mass and cutting a few coils off the main spring are practical options to drop the muzzle fpe and reduce the shot-cycle movement.

I have tried similar on other harsh shooting “budget” springers with some success. Better fitting guides, removing some preload and moving mass (removing a top hat) and adding a little more tacky spring grease can all smooth out a harsh shot cycle at the expense of a few fpe. IMO this is an excellent trade-off when it makes the rifle more fun and accurate to shoot.

However, trying to make a large solid (heavy) 16fpe springer shoot well at 8fpe is IMO not the right approach. I’ve tried it, it can be done, but I’ve restored all my sub 10fpe “experiments” BACK to near factory ratings because they had some quirky shot cycle anomalies. A really annoying one was a pronounced piston bounce that seemed to occur as the pellet was exiting the muzzle. THUMP….thump! Like a weird heart beat!

Obviously anyone can do whatever they want to their cheap ($25-$60) entry level springers. However, my recommendation is to tweak a rifle NEAR its design ratings to find a sweet spot for comfortable shooting and best accuracy. If the goal is to have an 8fpe springer, then START with one that is rated NEAR that from the factory!

I had the urge to shoot a sub 10fpe springer so I finally went out and bought one (or two). My first was a Hatsan Alpha youth rifle shooting around 5fpe. IMO this is EXACTLY what I was looking for. A small scale springer that was a pure joy to shoot. Super light cocking effort and no significant spring recoil. EASY to stack 500fps pellets at my 30′ range with open sights. If glass is preferred there will be no scope damaged or wandering POA problems with this MILD springer.

There are other youth options in this size/fpe range, but I have no experience with them.

I did acquire a Beeman Black Cub 177/22 from a WM clearance for $45. This rifle shoots the 177 well at around 10fpe so it fits my basement/backyard plinker needs. Biggest problem though is the single stage direct sear HEAVY trigger. Sometimes these triggers can be improved (a little) but it’s also easy to RUIN the trigger and make the rifle unsafe/unusable if you go a little too far.

Beeman Black Cub Review Link

Working on the 1100ss INTERNALS:

>Remove the stock, (3) M6 screws.
>Remove the anti-bear-trap & safety-reset bar by unhooking the spring and sliding the bar towards the muzzle.
>Remove the safety leaver, one short pin with E-clip and one skinny longer pin, it should fall right out.
>Remove the trigger blade AND its bracket, one short pin with E-clip.
>Remove the rear socket head cap screw (5mm hex).
>Remove the rear plastic cap by gently tapping out the larger cross-pin (REAR PIN).

On my rifle the smaller cross-pin (FRONT PIN) was holding all the spring pressure.

>IF you have the trigger mod set-screw installed, back it out ~3 turns NOW so the trigger group can slide out without interference.

>Remove the trigger assembly by gently tapping towards the rear, it should move and pop out with minimal effort.

Getting the trigger group back in with the main piston latch in the correct position is a REAL CHALLENGE!

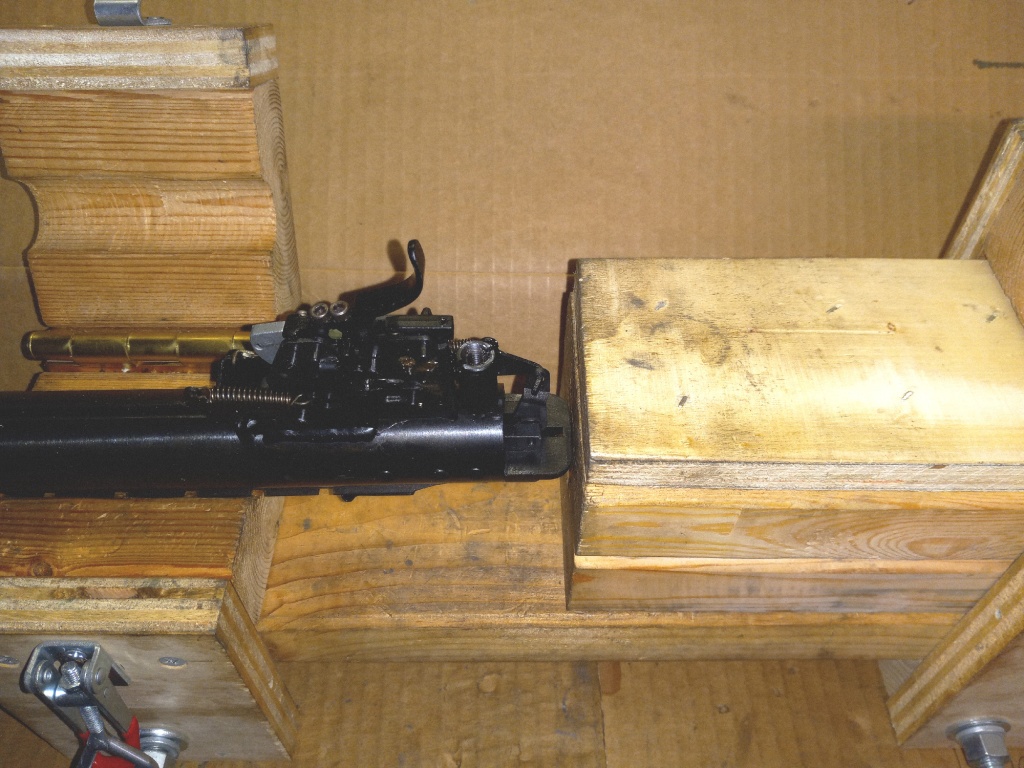
>IN A SPRING COMPRESSOR put some force on the center steel spring guide until the smaller FRONT cross pin can be gently tapped out.

>Slowly relieve spring compression until rear spring guide assembly can be safely removed.

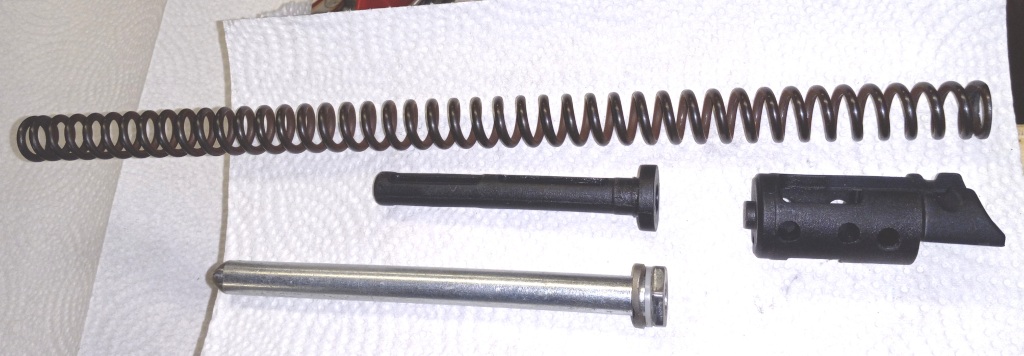
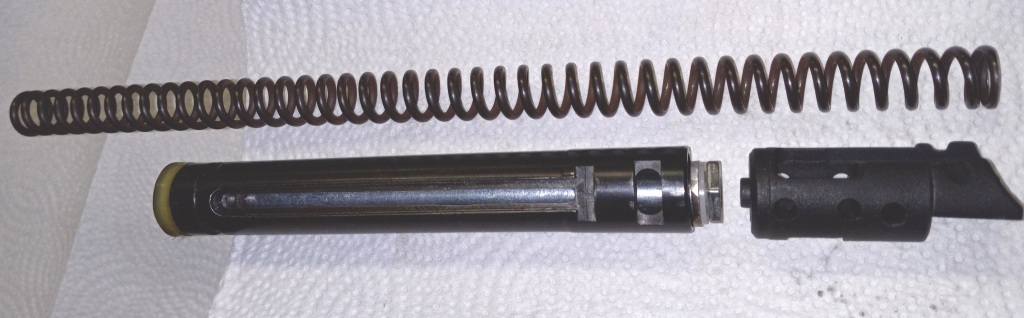
>Remove spring and top hat.

>UNLATCH barrel and remove the pivot bolt locking screw and pivot bolt.

Barrel assembly should slide out from between the forks and the cocking link/shoe can be freed from the cocking slot.

>Piston can now be removed from the compression tube.

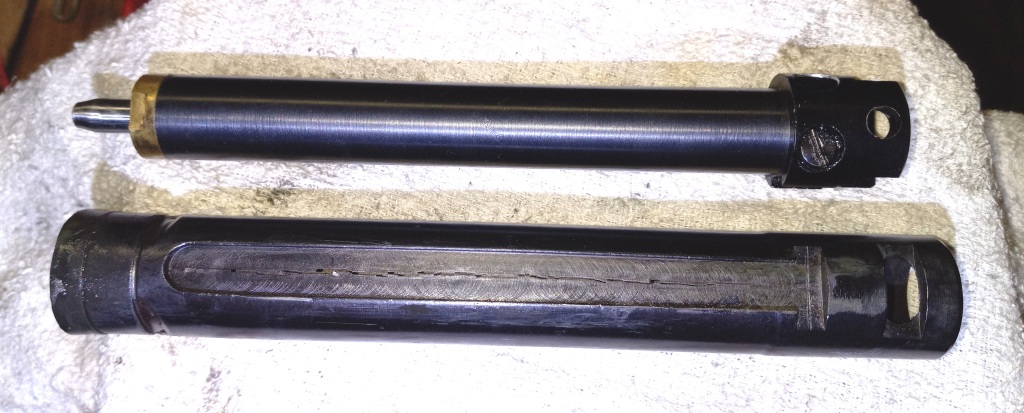
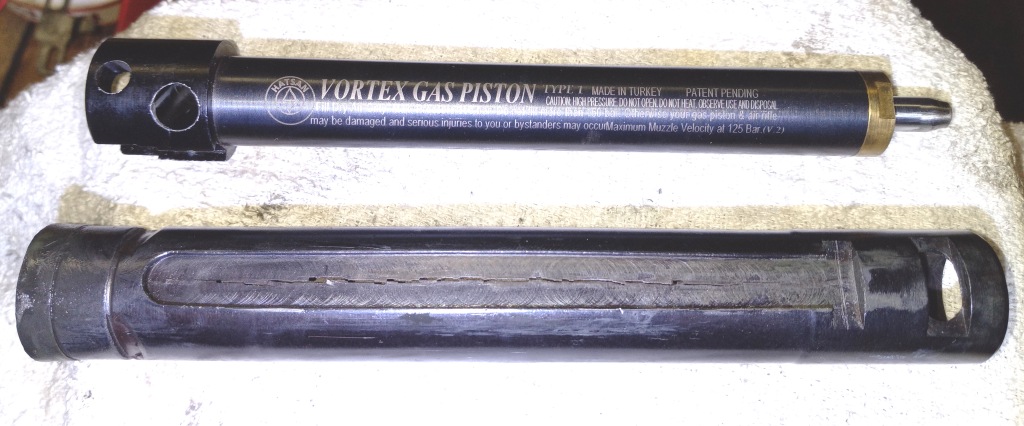
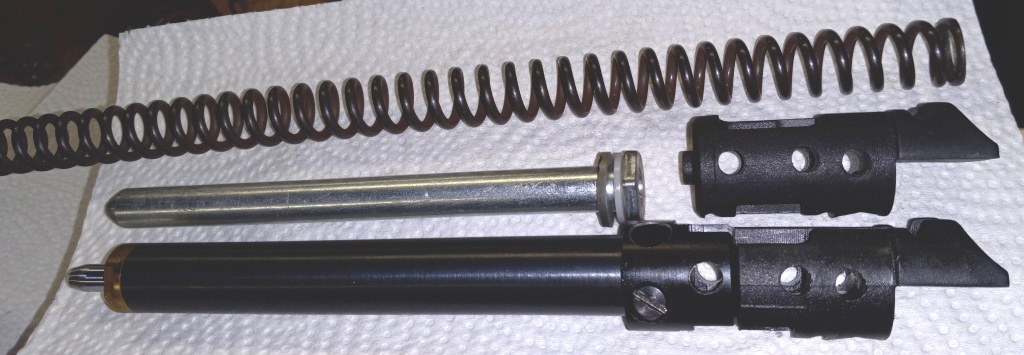
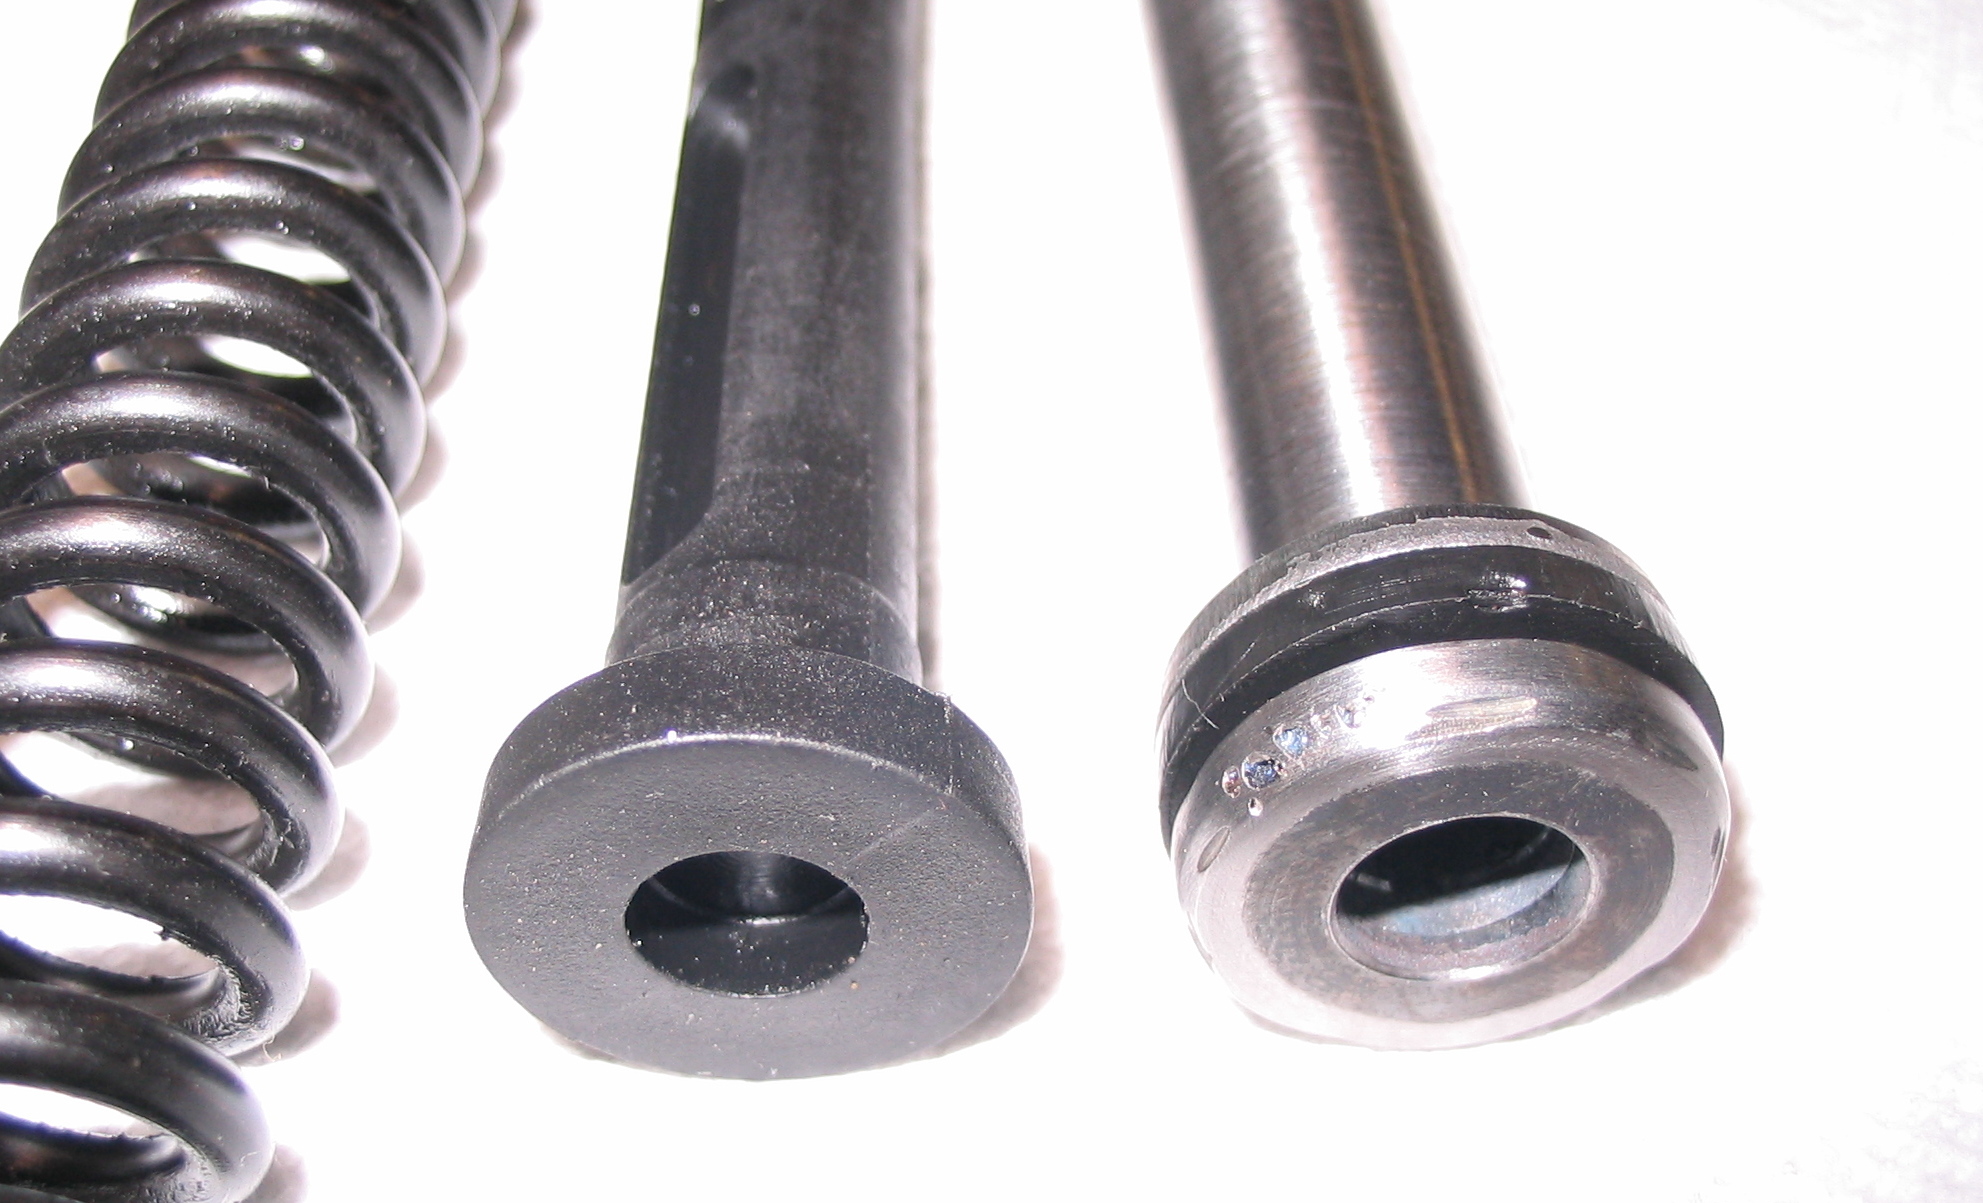
Spring & piston had a heavy coating of VERY tacky grease. Rifle was NOT obviously dieseling, but I think THAT GREASE is why this rifle shoots fairly well right out of the box. The super loose fitting top-hat and a laughably short and loose fitting spring guide don’t do anything to support the spring or dampen spring vibrations. In this case the sticky factory grease is working well IMO.

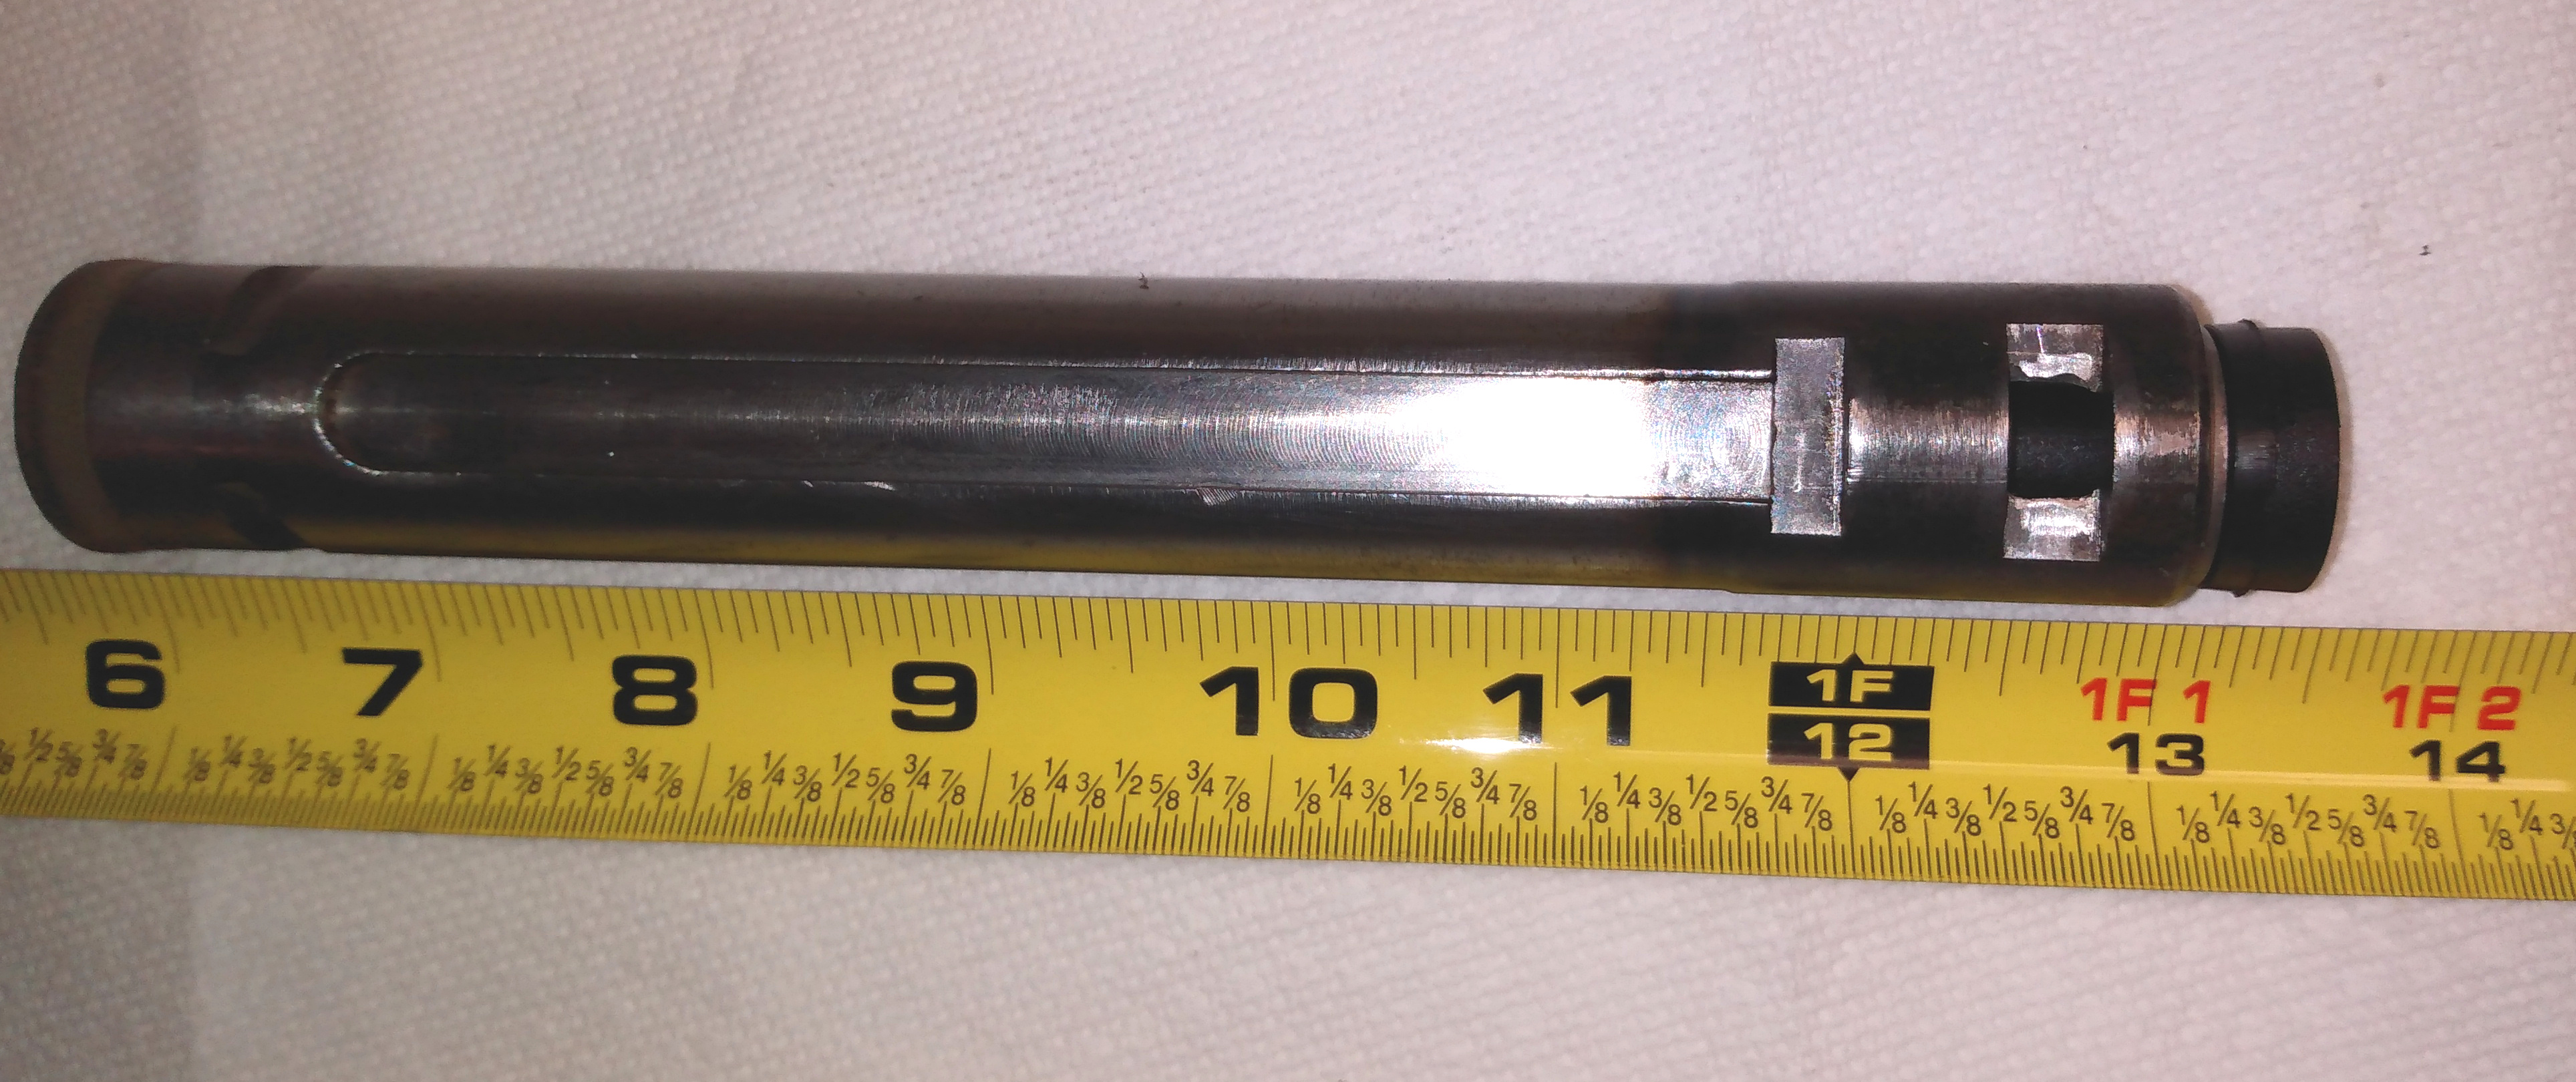
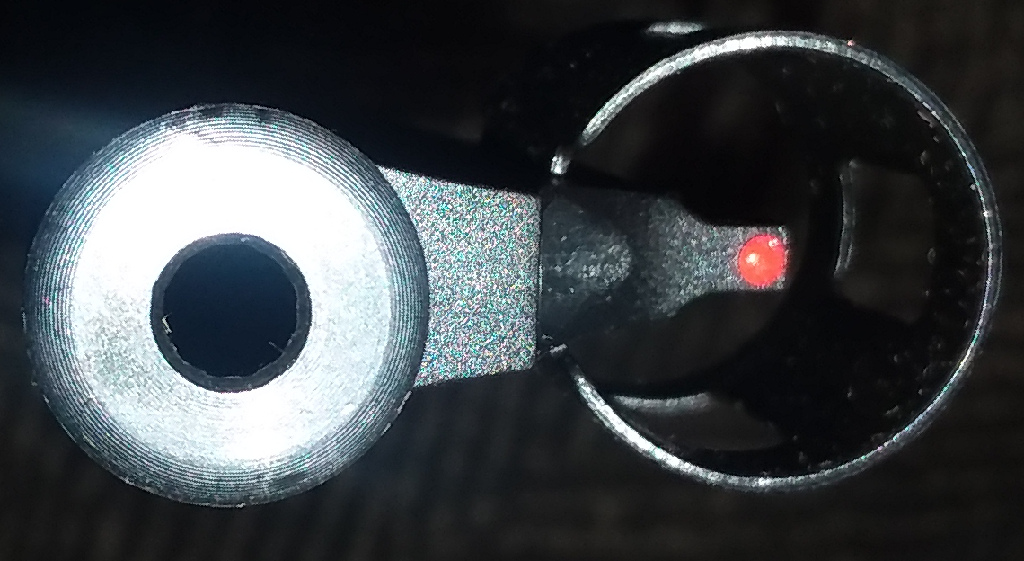
My rifle had what looked like either rust or very hard dry crusty brown factory grease in the REAR HALF of compression tube. This is the section from where the cocking slot STARTS going rearward. The FRONT part of the compression tube, where all the compression magic occurs, was highly polished. That shiny part is EXACTLY what it needs to be and I ONLY wipe out the excess factory lube from that section. NO scrubbing or cross-hatch honing! That is for steel ringed pistons in IC engines! NOT for springer compression tubes! I WANT a shiny & polished surface for the slippery polymer piston seal or o-ringed piston options.

The rear crusty section had lots of cutout burrs and some galling (NOT from piston skirt, just factory finish slack) where the cross pins reside. I used a small needle file to de-burr all the cutouts. Then I chucked up some Scotchbrite on a dowel and using a hand drill polished the REAR half of the compression tube until it was almost as smooth as the front section. No need to go crazy here, I just wanted a SMOOTHER pathway for the piston seal so it wouldn’t get SLICED UP during reassembly.


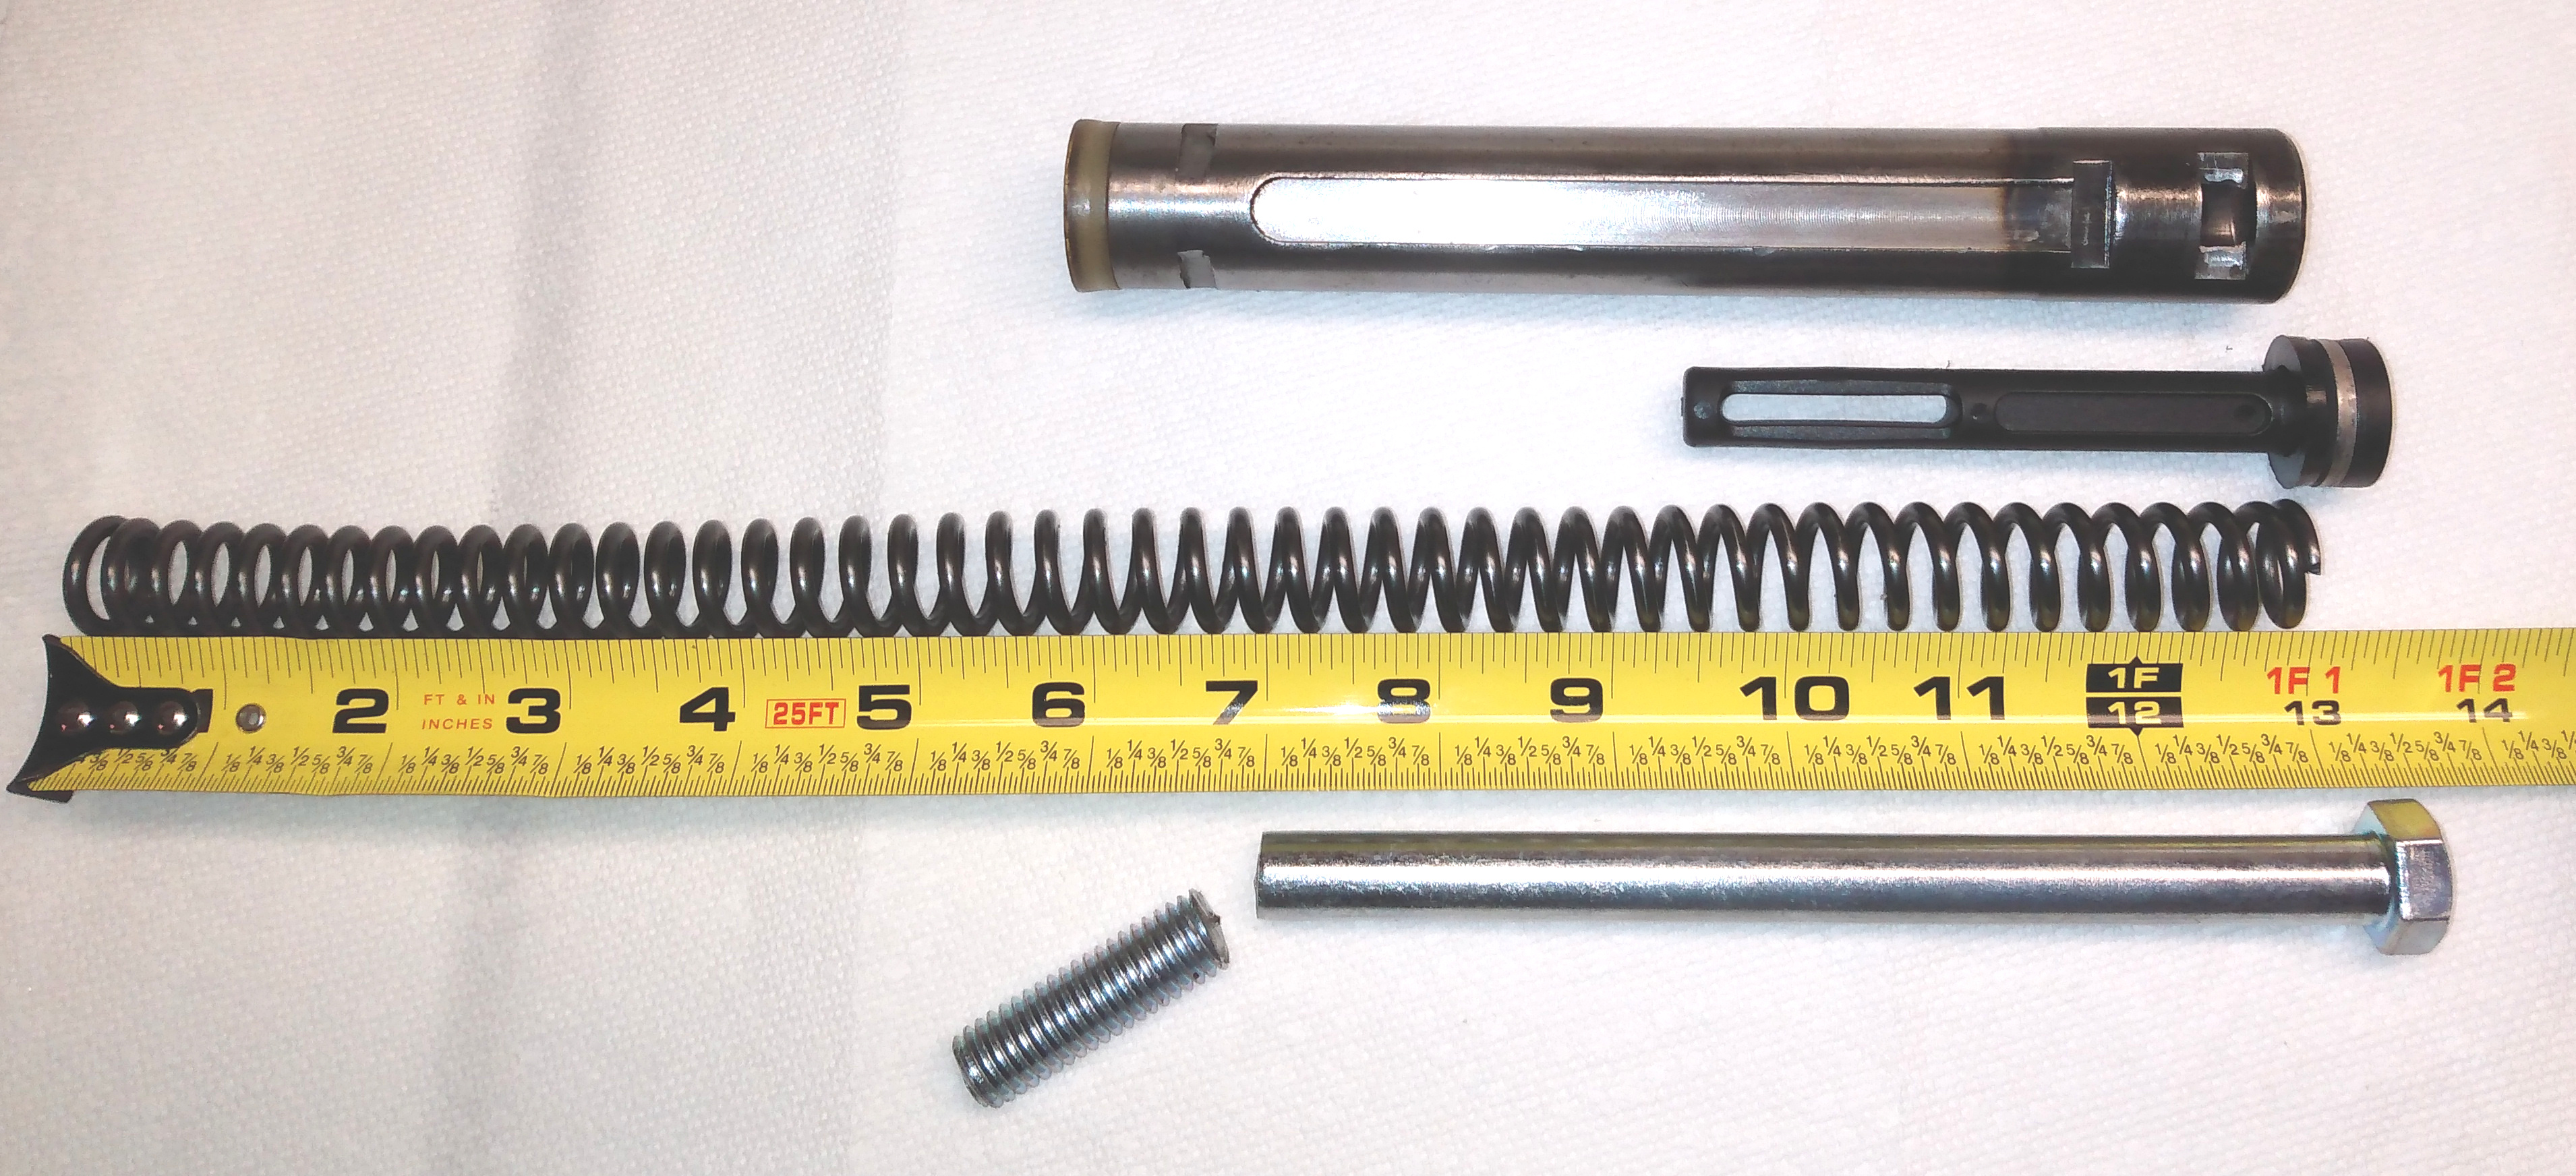
Some interesting dimensional NOTES:
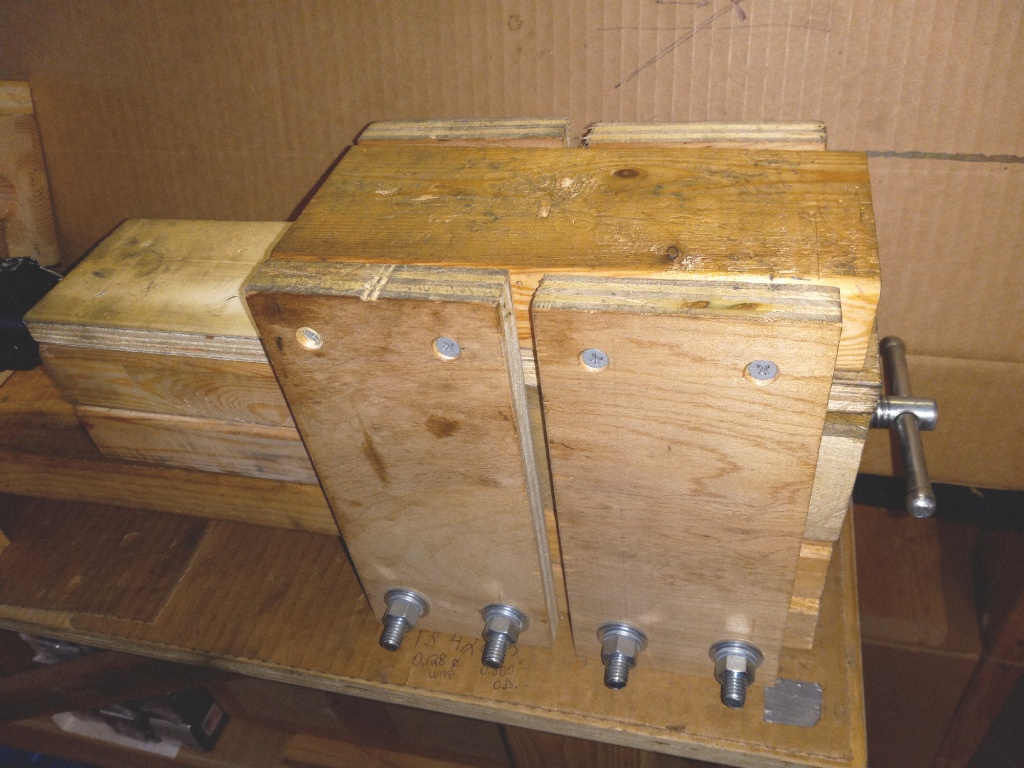
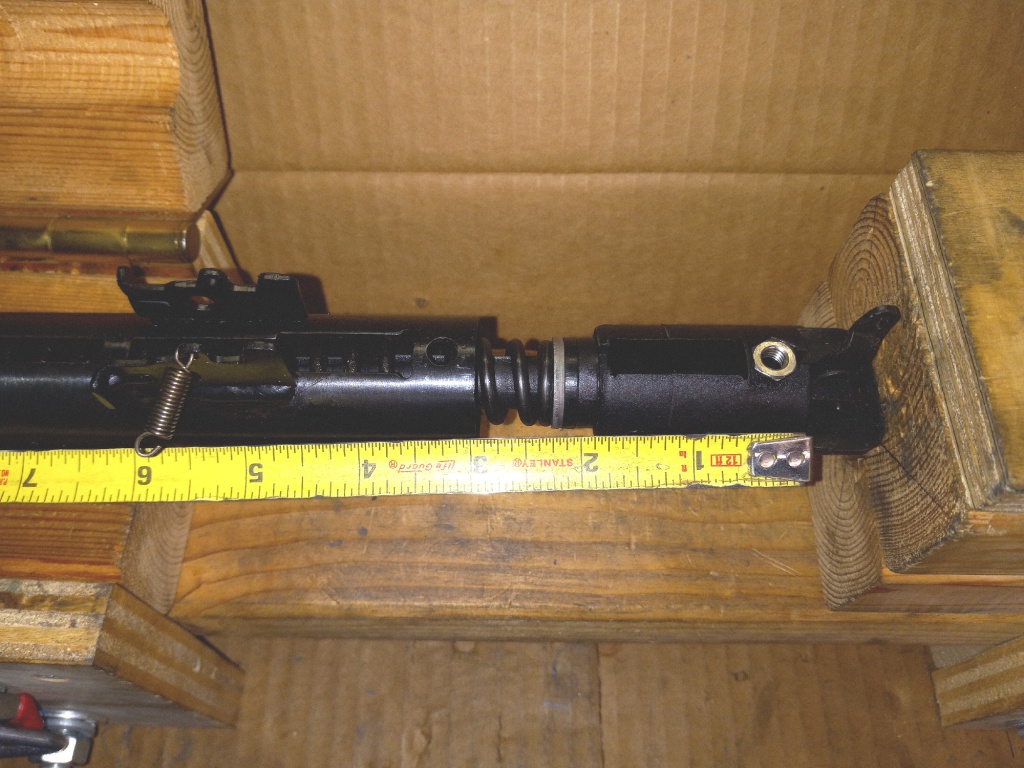
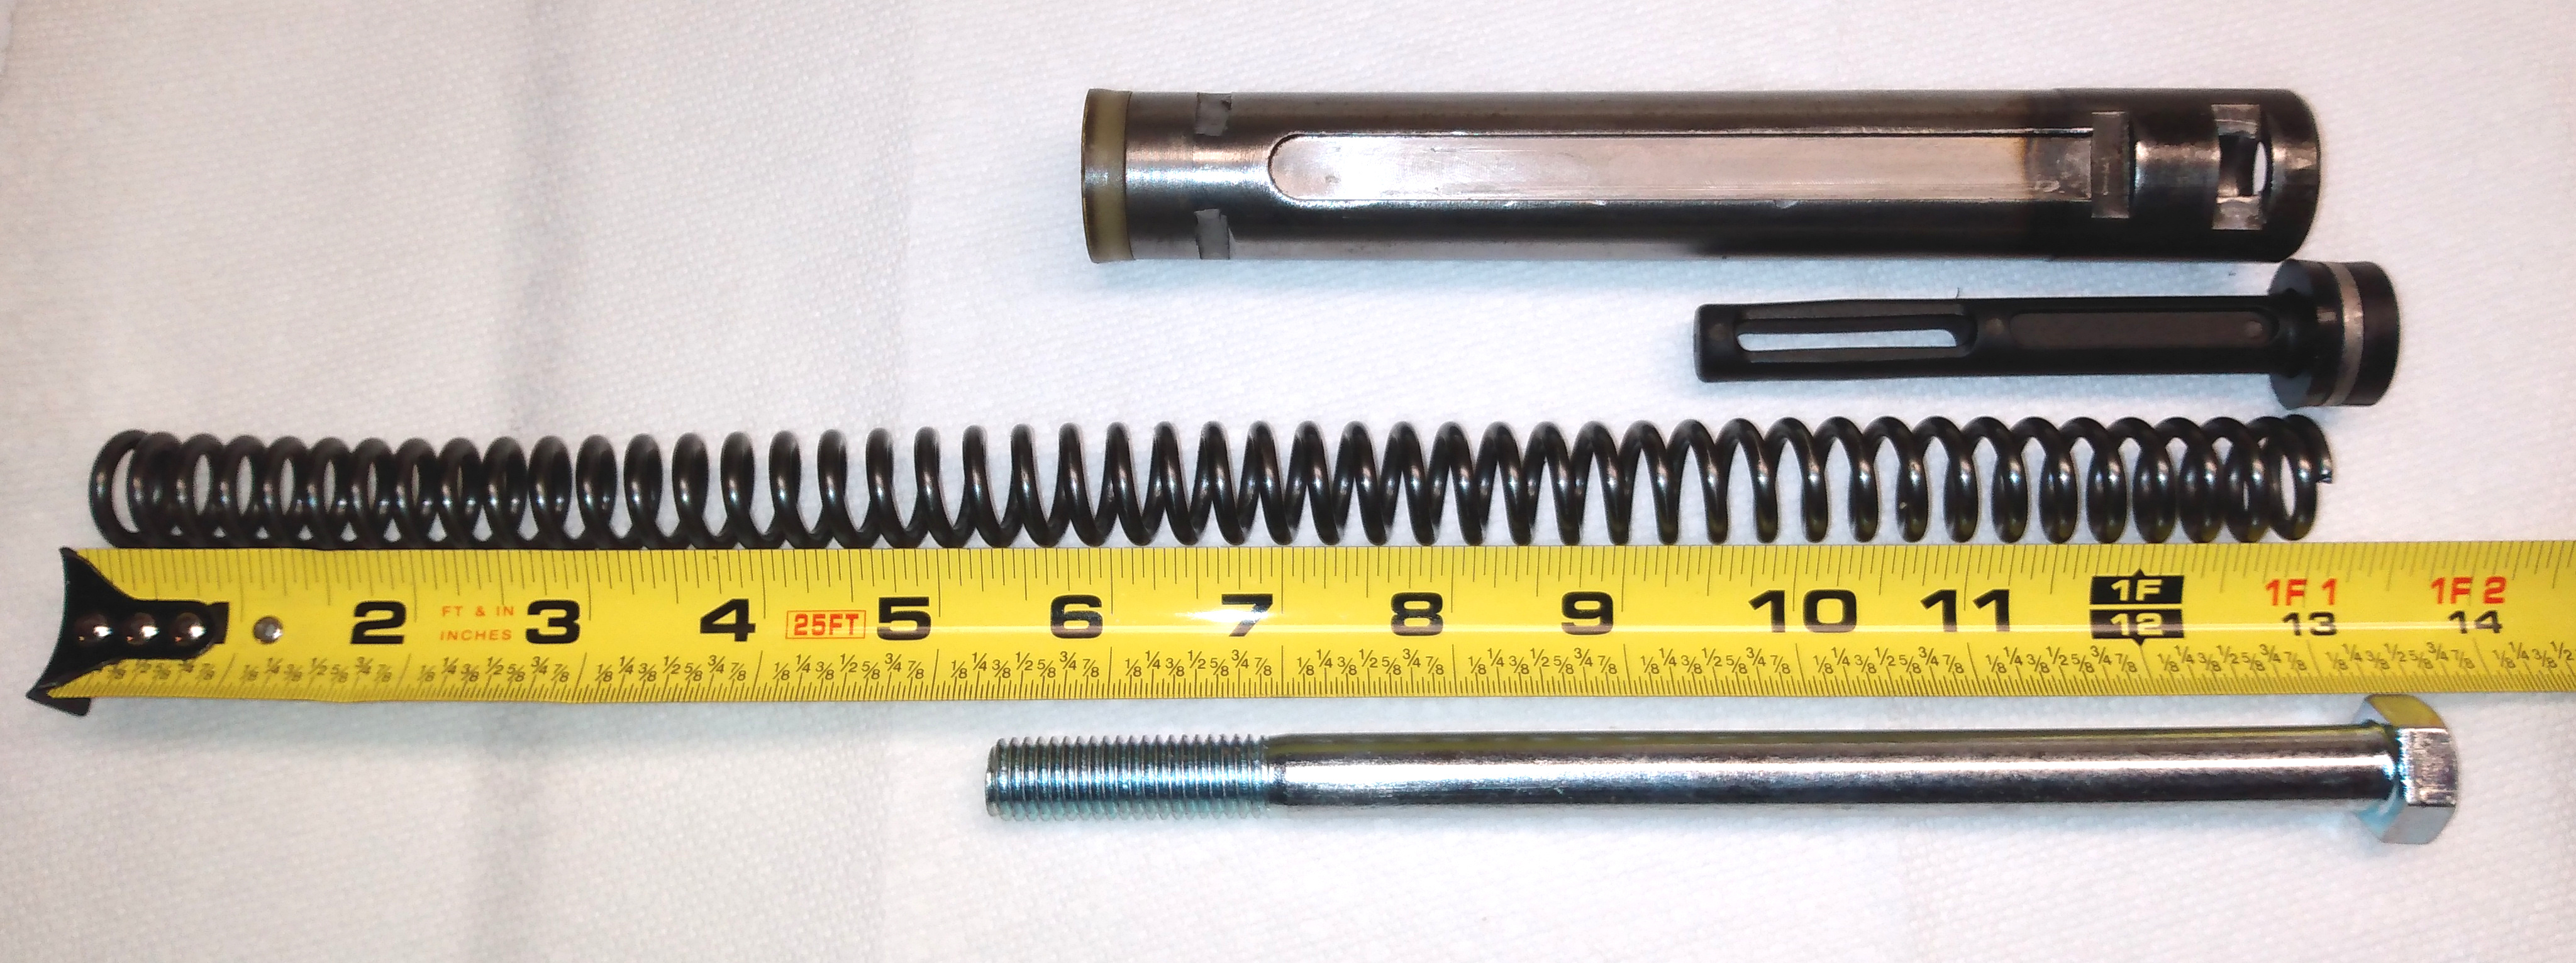
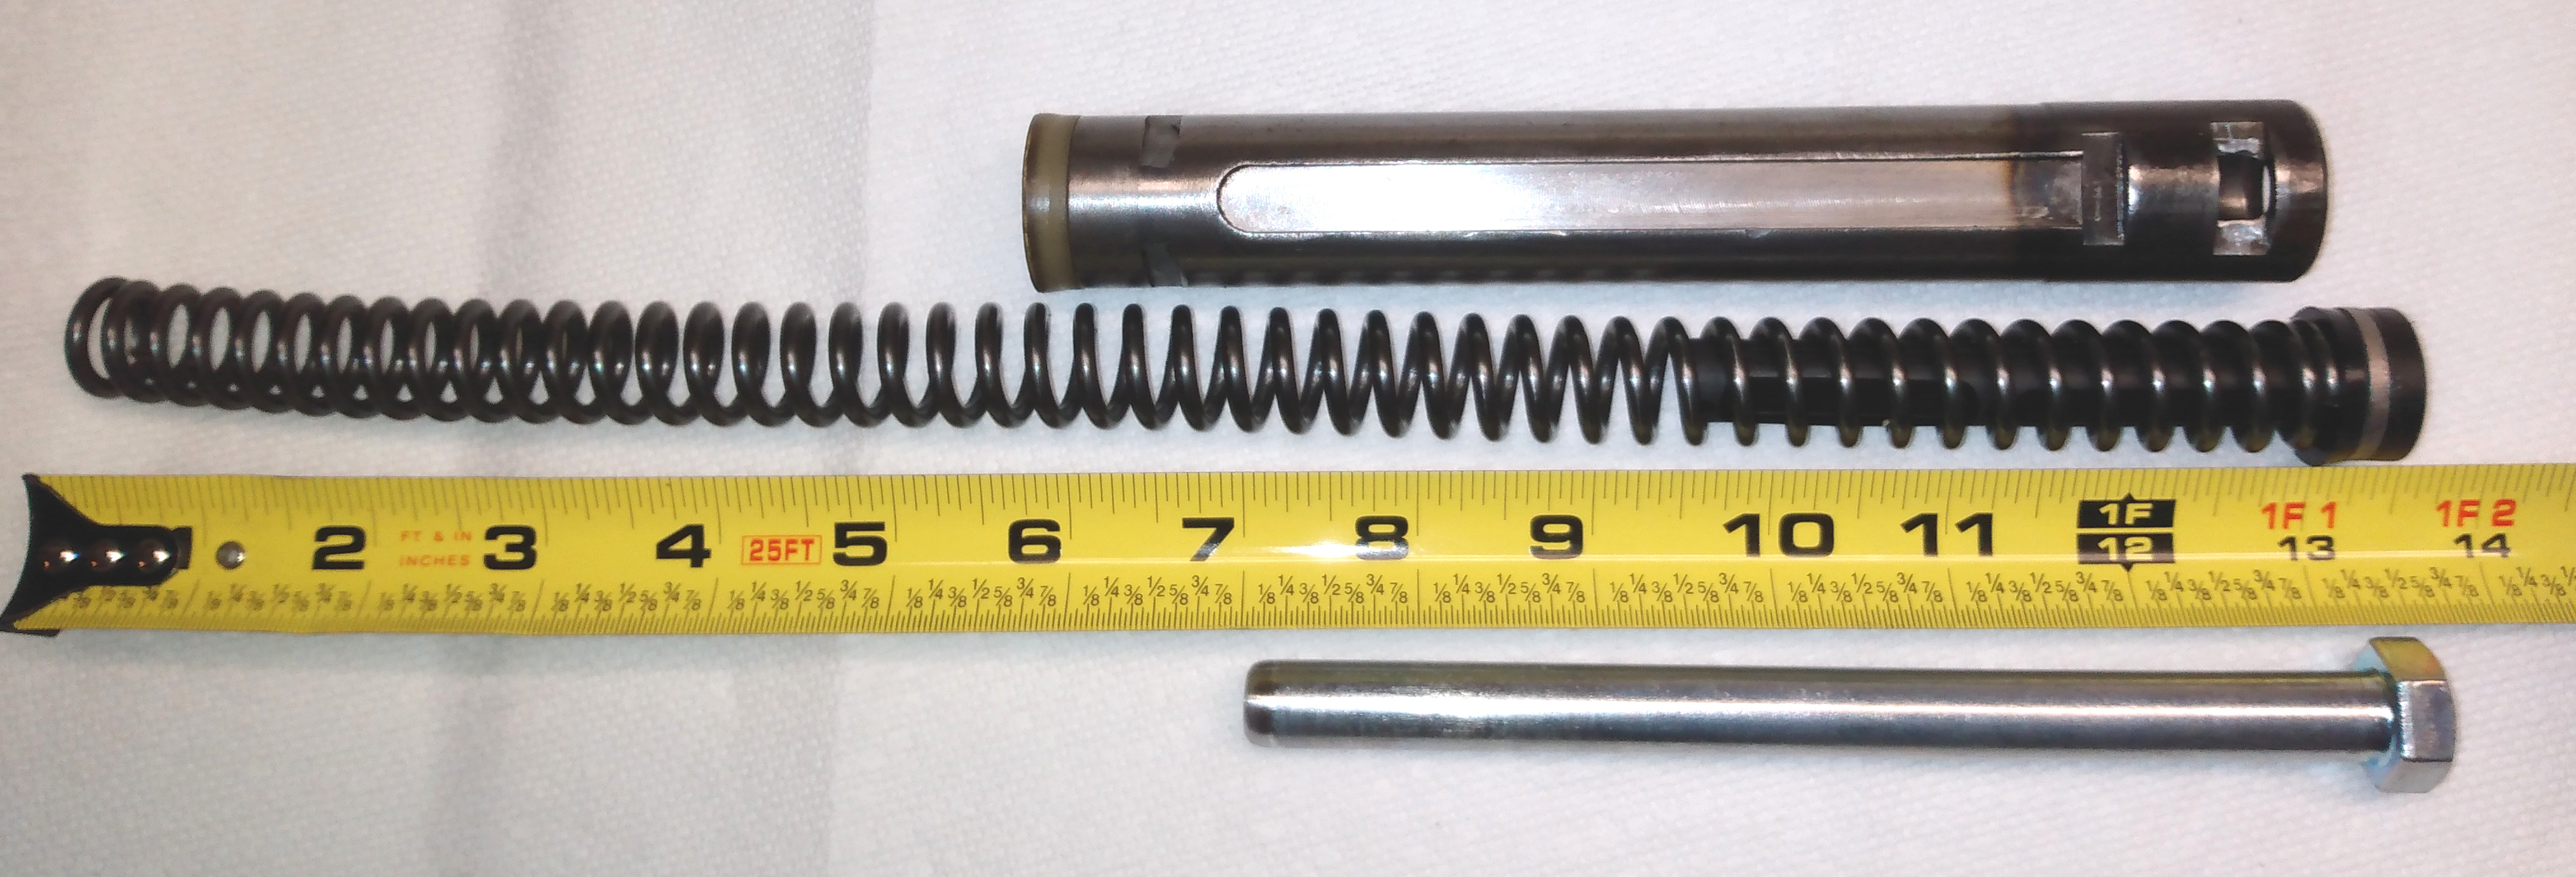
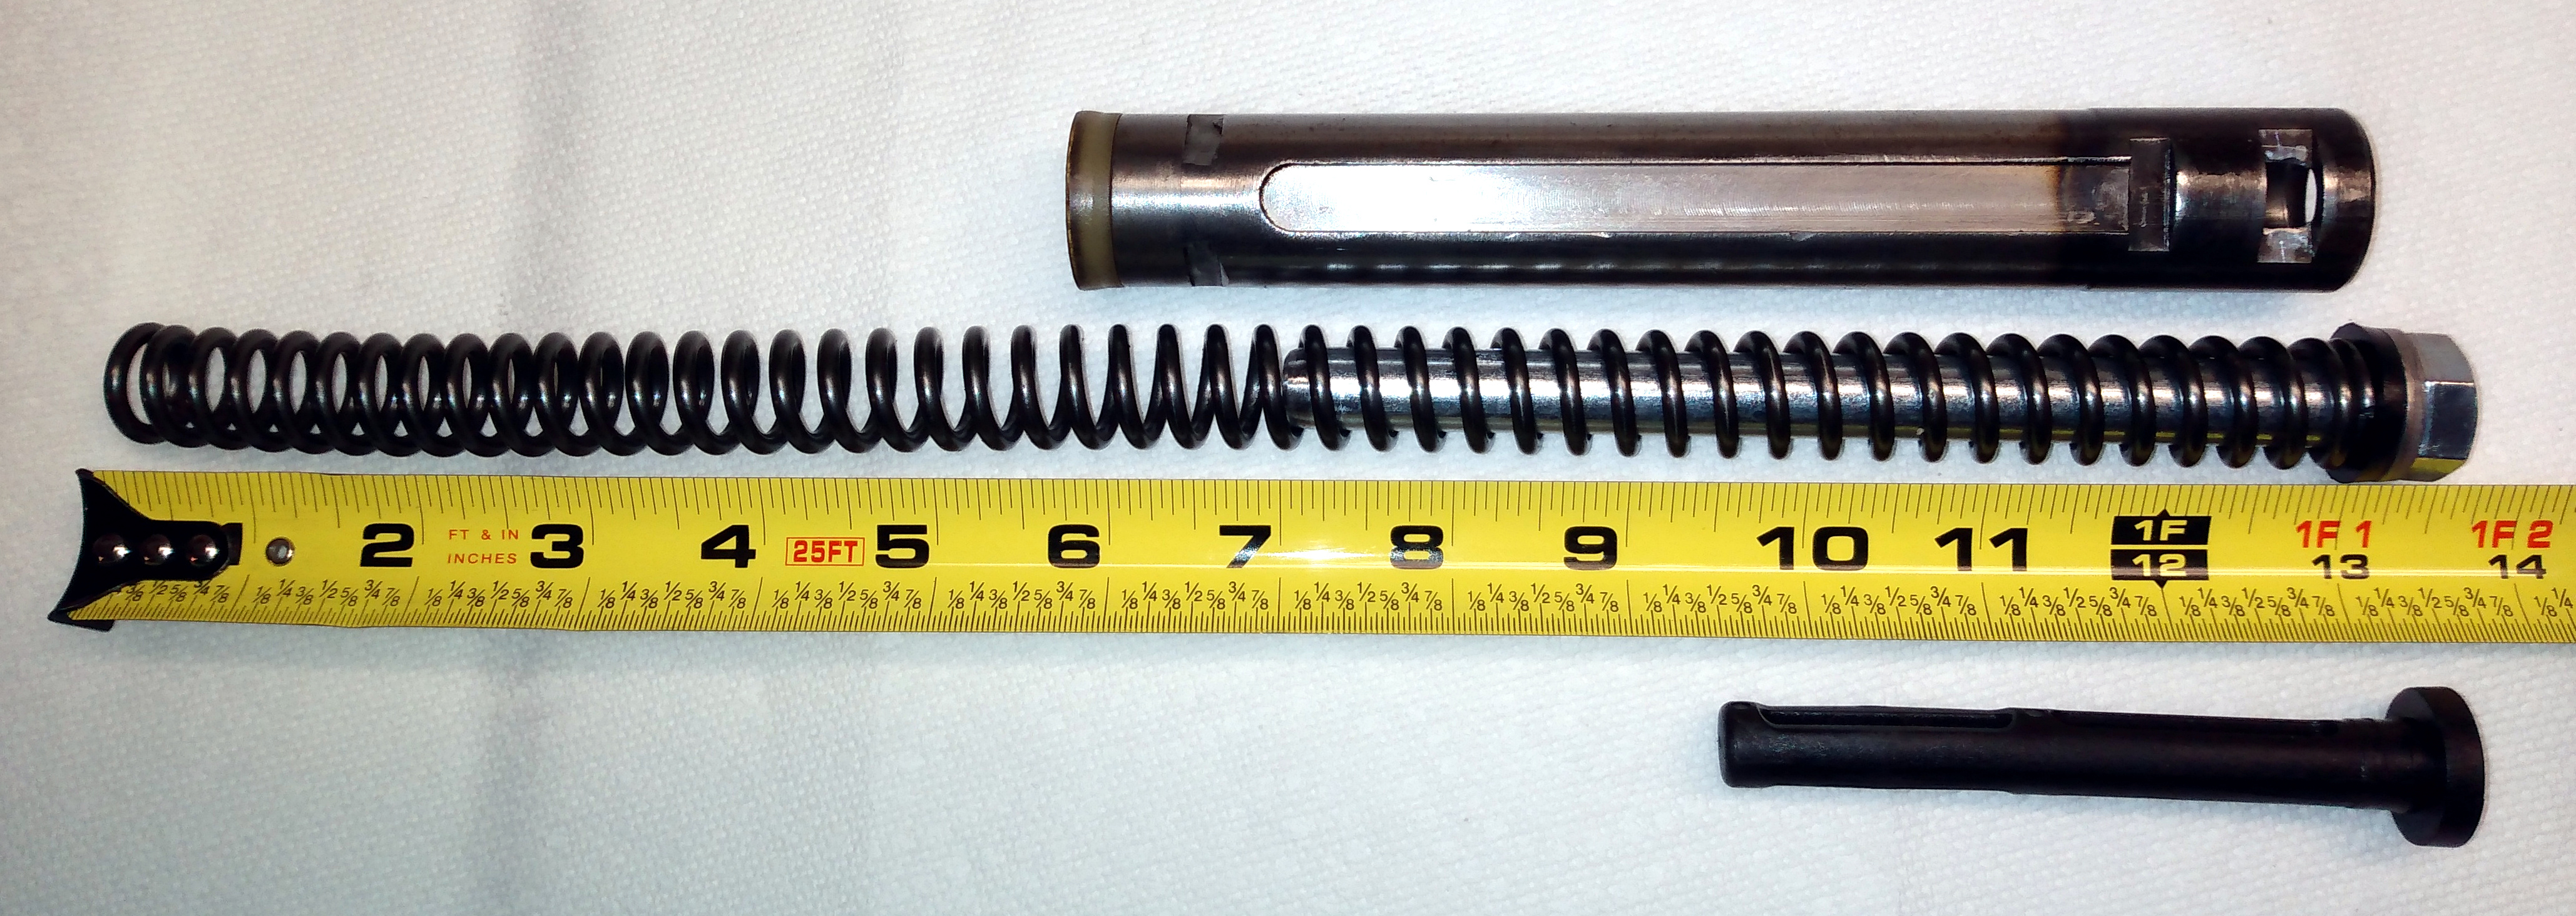
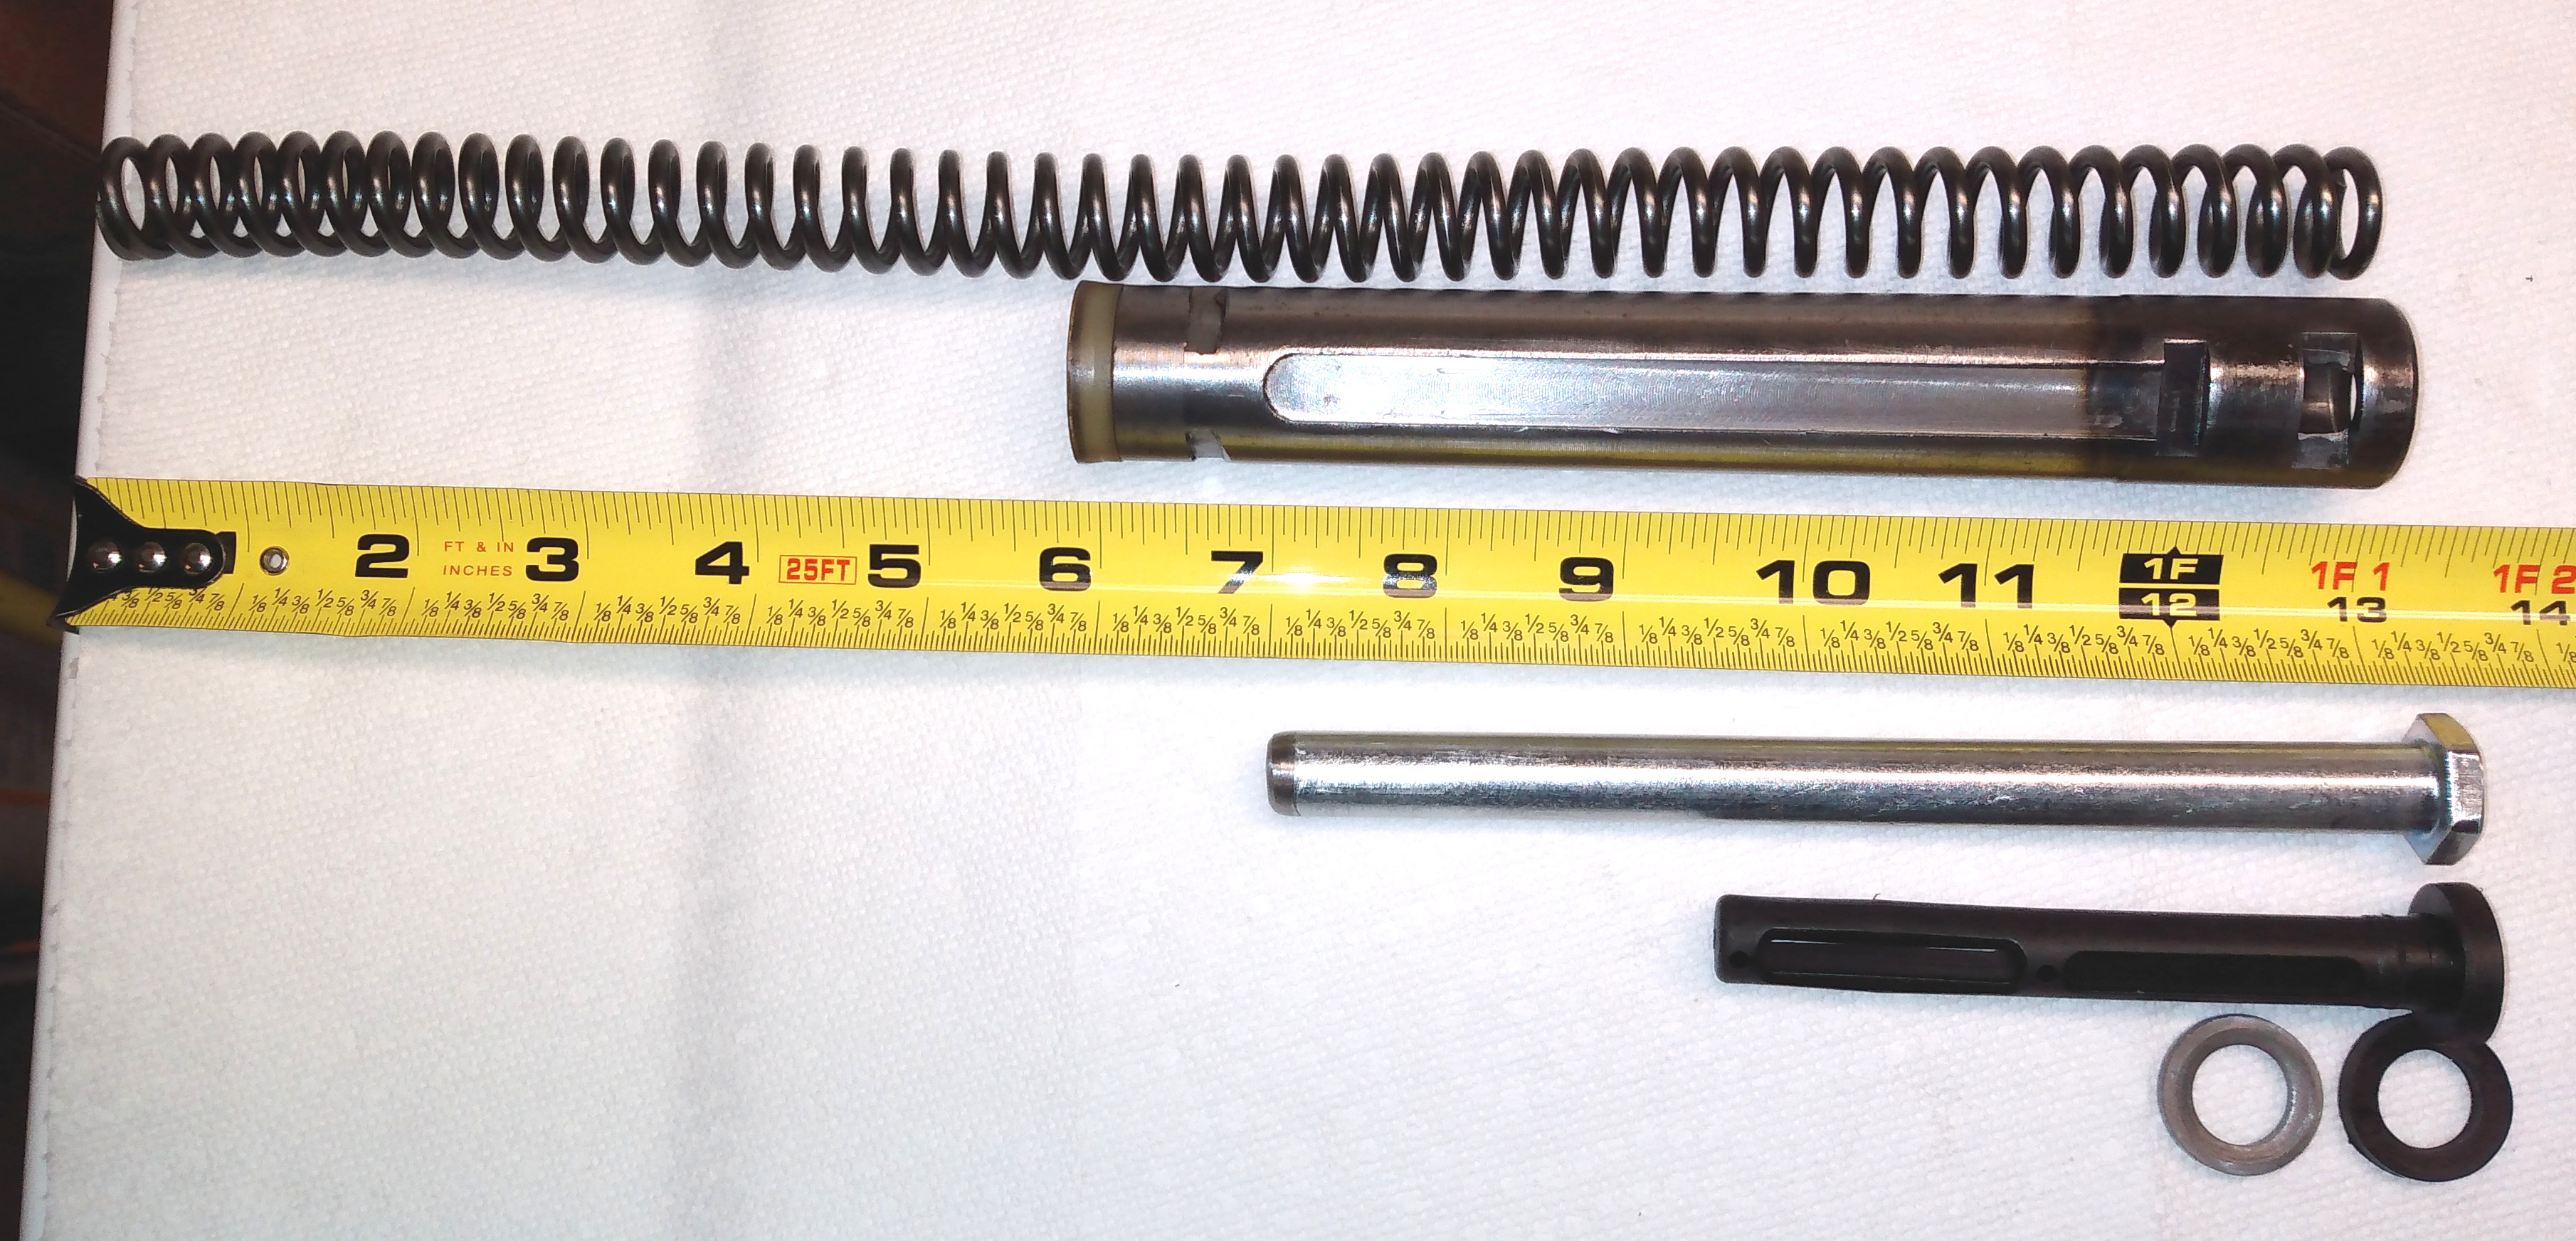
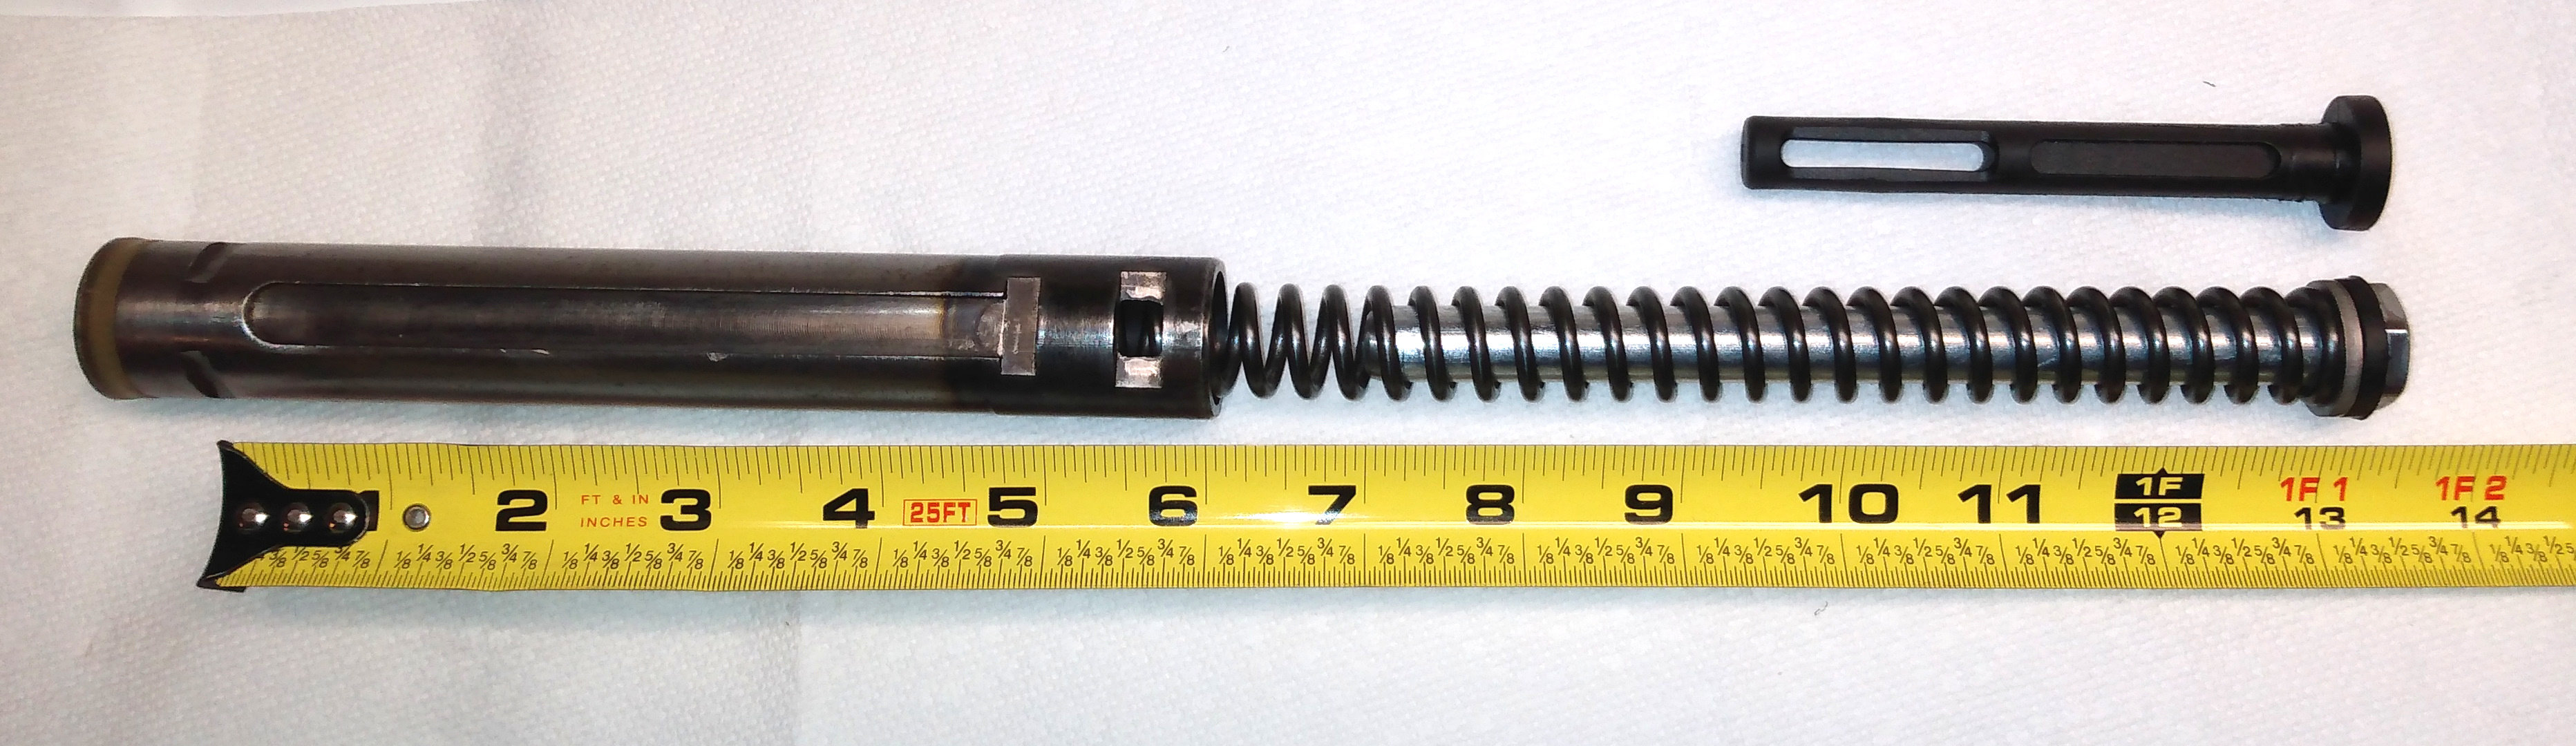
Spring Dimensions

Free Length, 11″, 279mm
Active Coils, 35
OD, 0.762″, 19.4mm
Wire Diameter, 0.128″, 3.3mm
ID, 0.505″, 12.8mm

(I have not found a direct cross reference to a “drop in” Vortek spring)

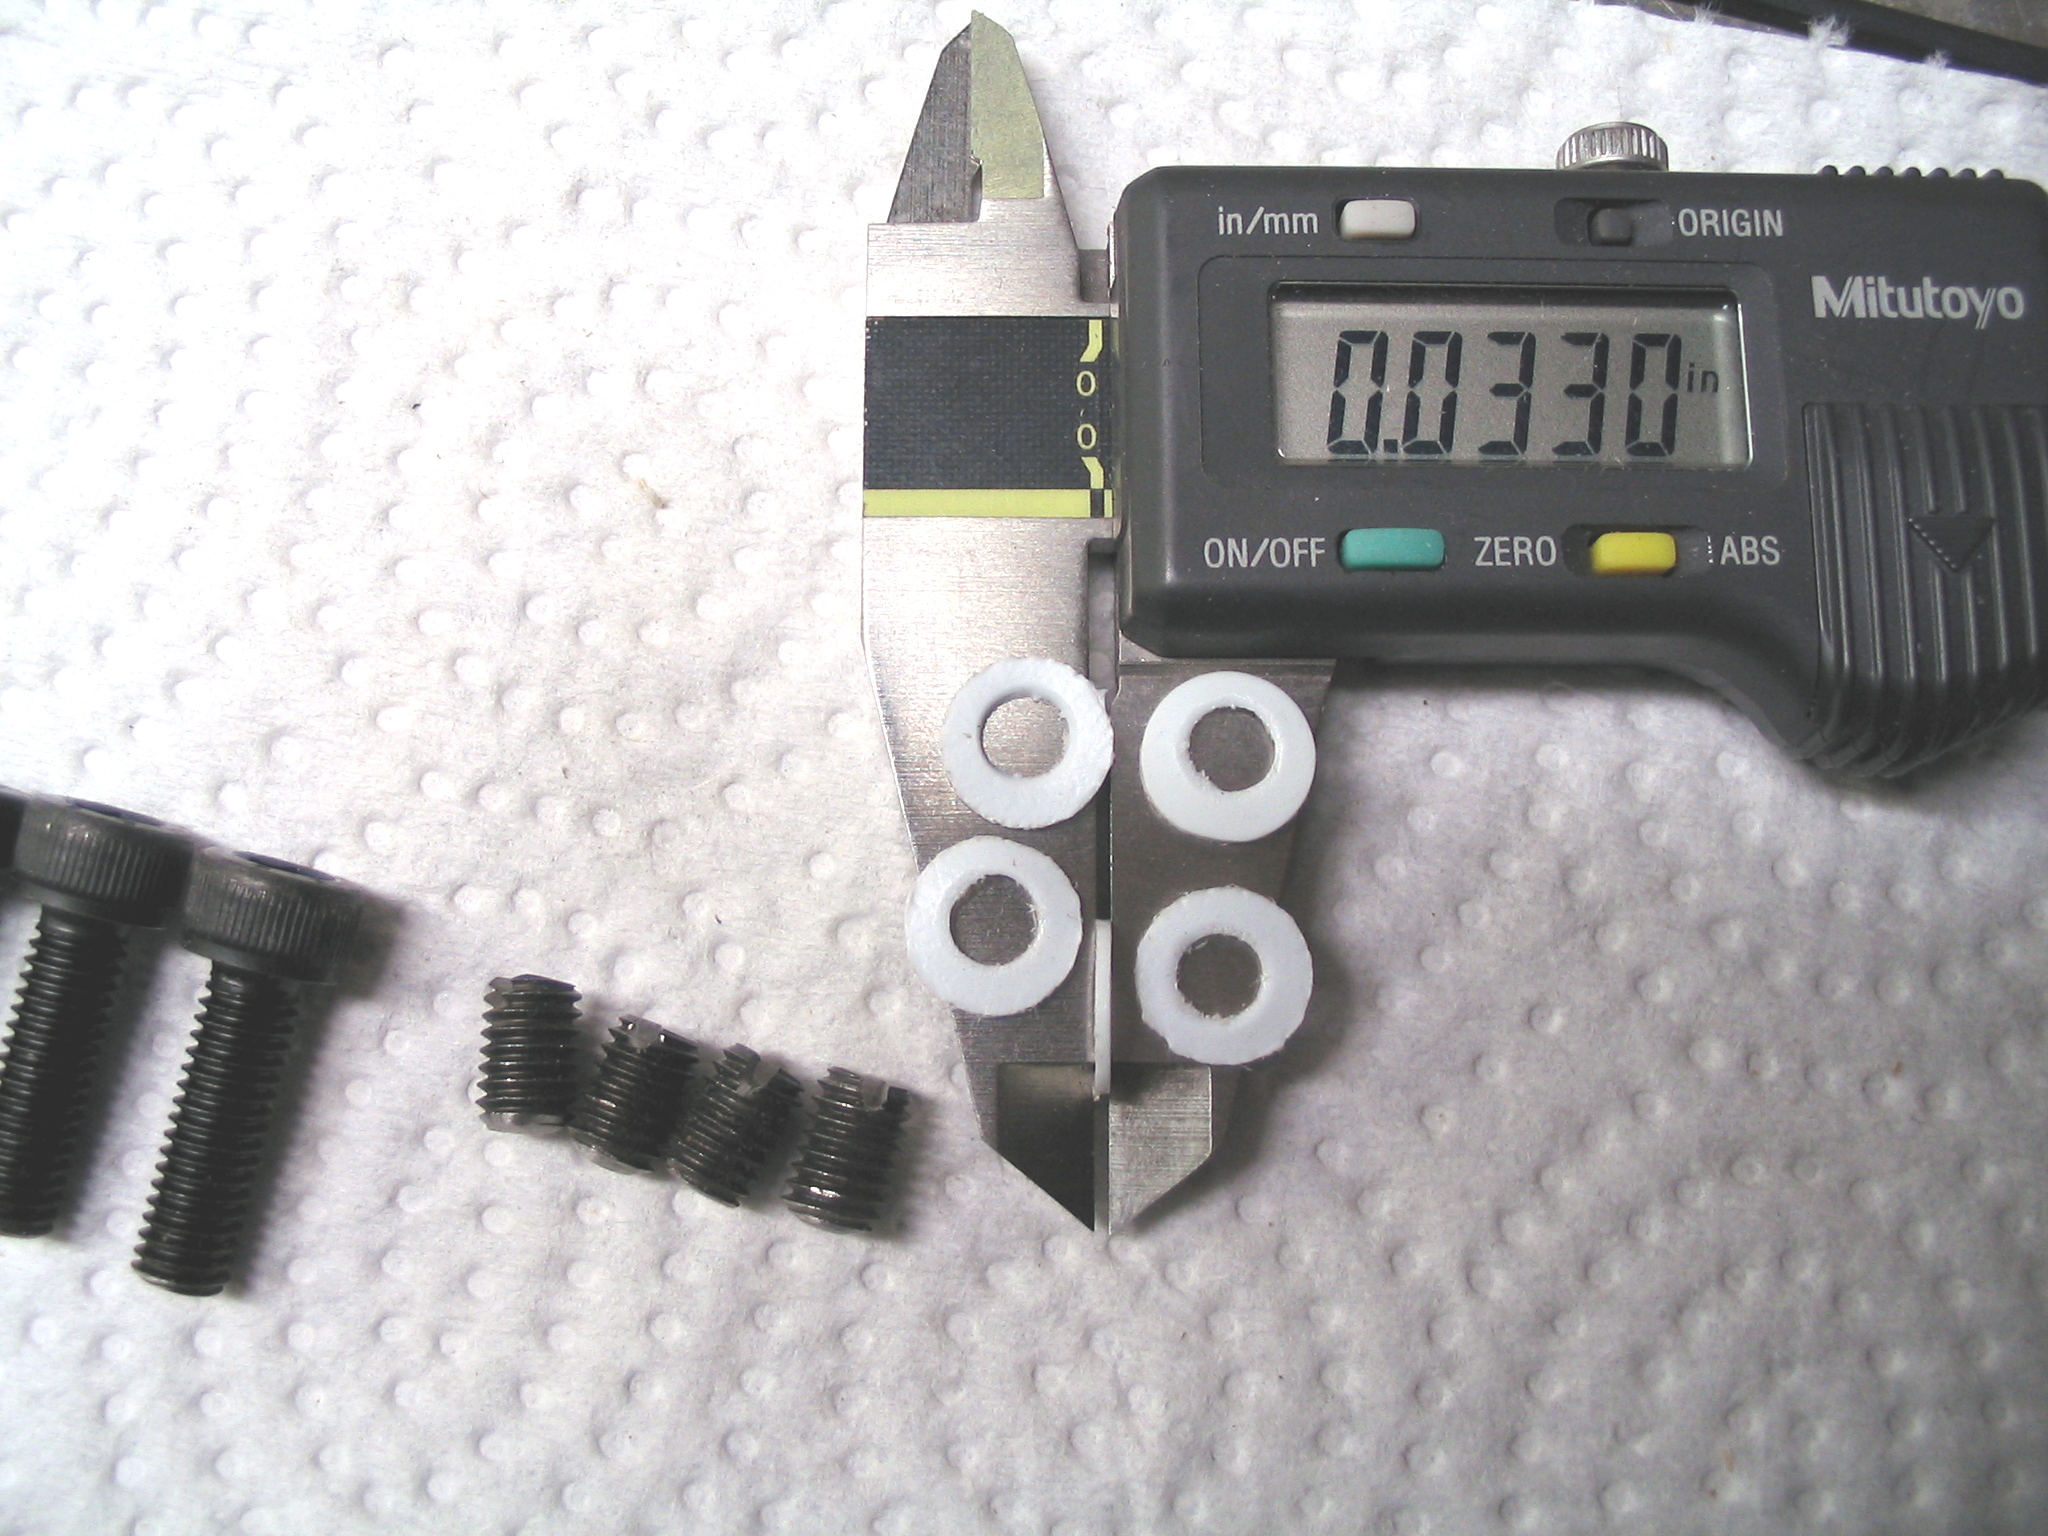
Piston Seal Dimensions

Thickness, 0.245″, 6.2mm
Min ID, 0.485″, 12.3mm
Max ID, 0.645″, 16.4mm
ID Flat, 0.039″, 1.0mm <this is interesting!?
ID Taper, 0.206″, 5.2mm
Max OD, 1.075″, 27.3mm

(I have not found a direct cross reference to a “drop in” Vortek seal)

Dianna 28mm seal I have has similar ID taper but OD is too wide and it is not “thick” enough unless an additional 0.039″ (1mm) thick washer is placed on piston head first.

A Hatsan Small seal has the right OD and thickness but it will NOT fit this tapered button piston head! Hatsan piston seals fit a two-step (straight, not tapered) piston button.

Piston & Seal Weight, 10.7oz, 303g
Top Hat Weight, 2oz, 57g
Moving mass (no spring), 12.7oz, 360g

This is initially bad news for getting easy/cheap replacement wear parts (springs & piston seals) for these bargain rifles. I’ll continue to look for replacement parts and post updates if I find any.


After a thorough de-burr and cleaning I applied my preferred (THIN) moly paste coating to the piston head and skirt and a super light burnished coating to the entire inside of the compression tube.

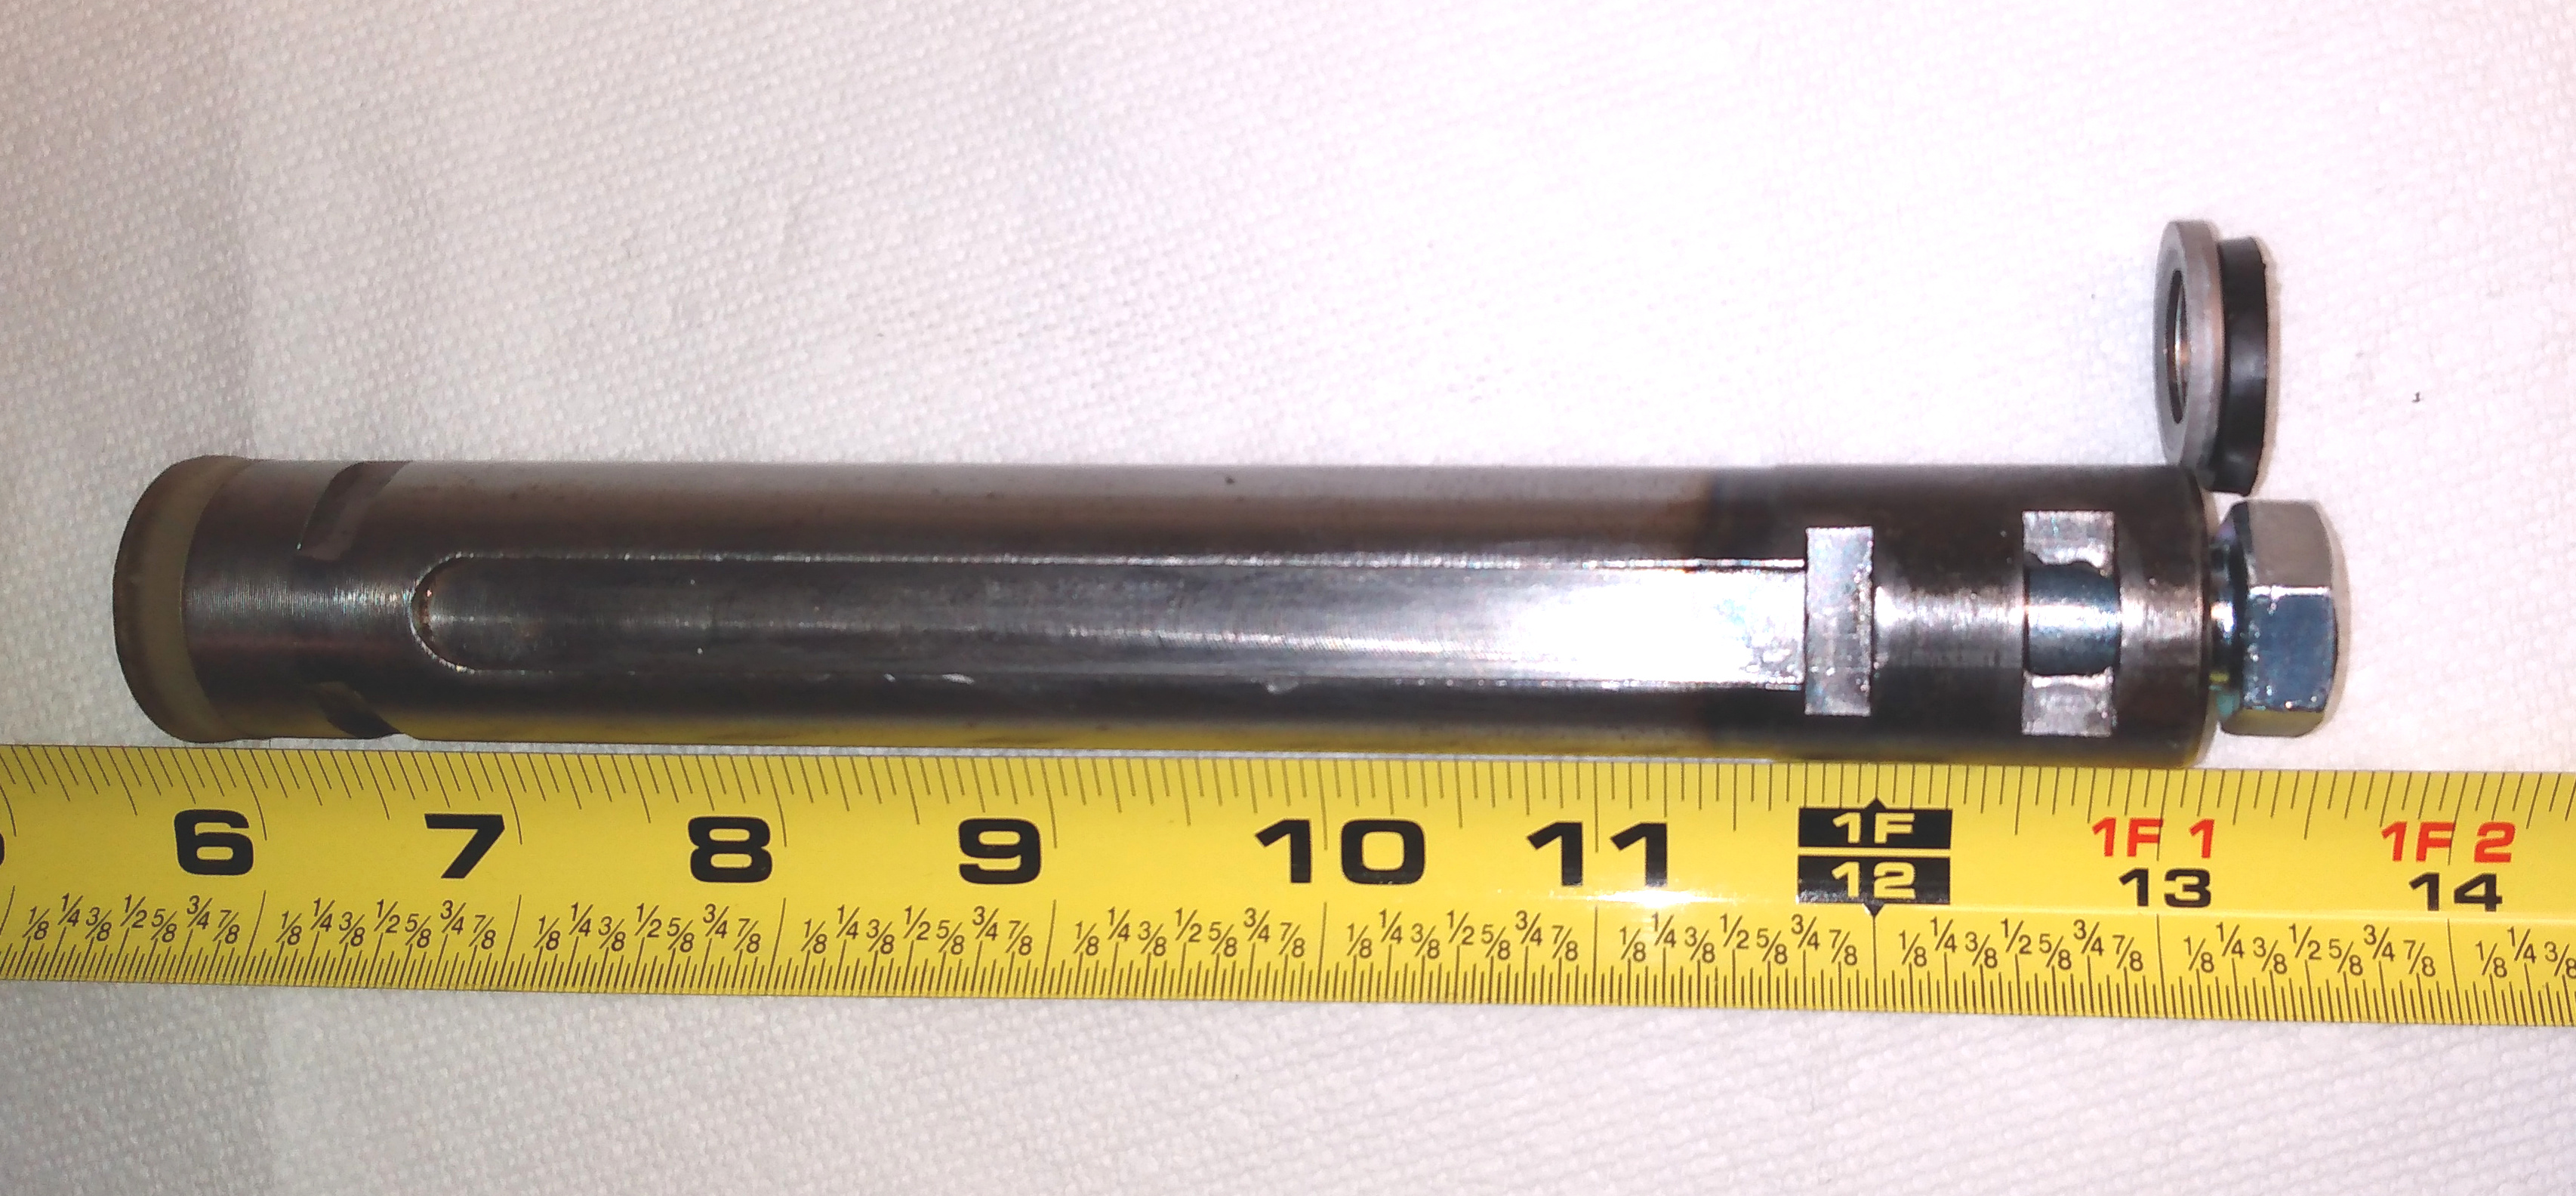
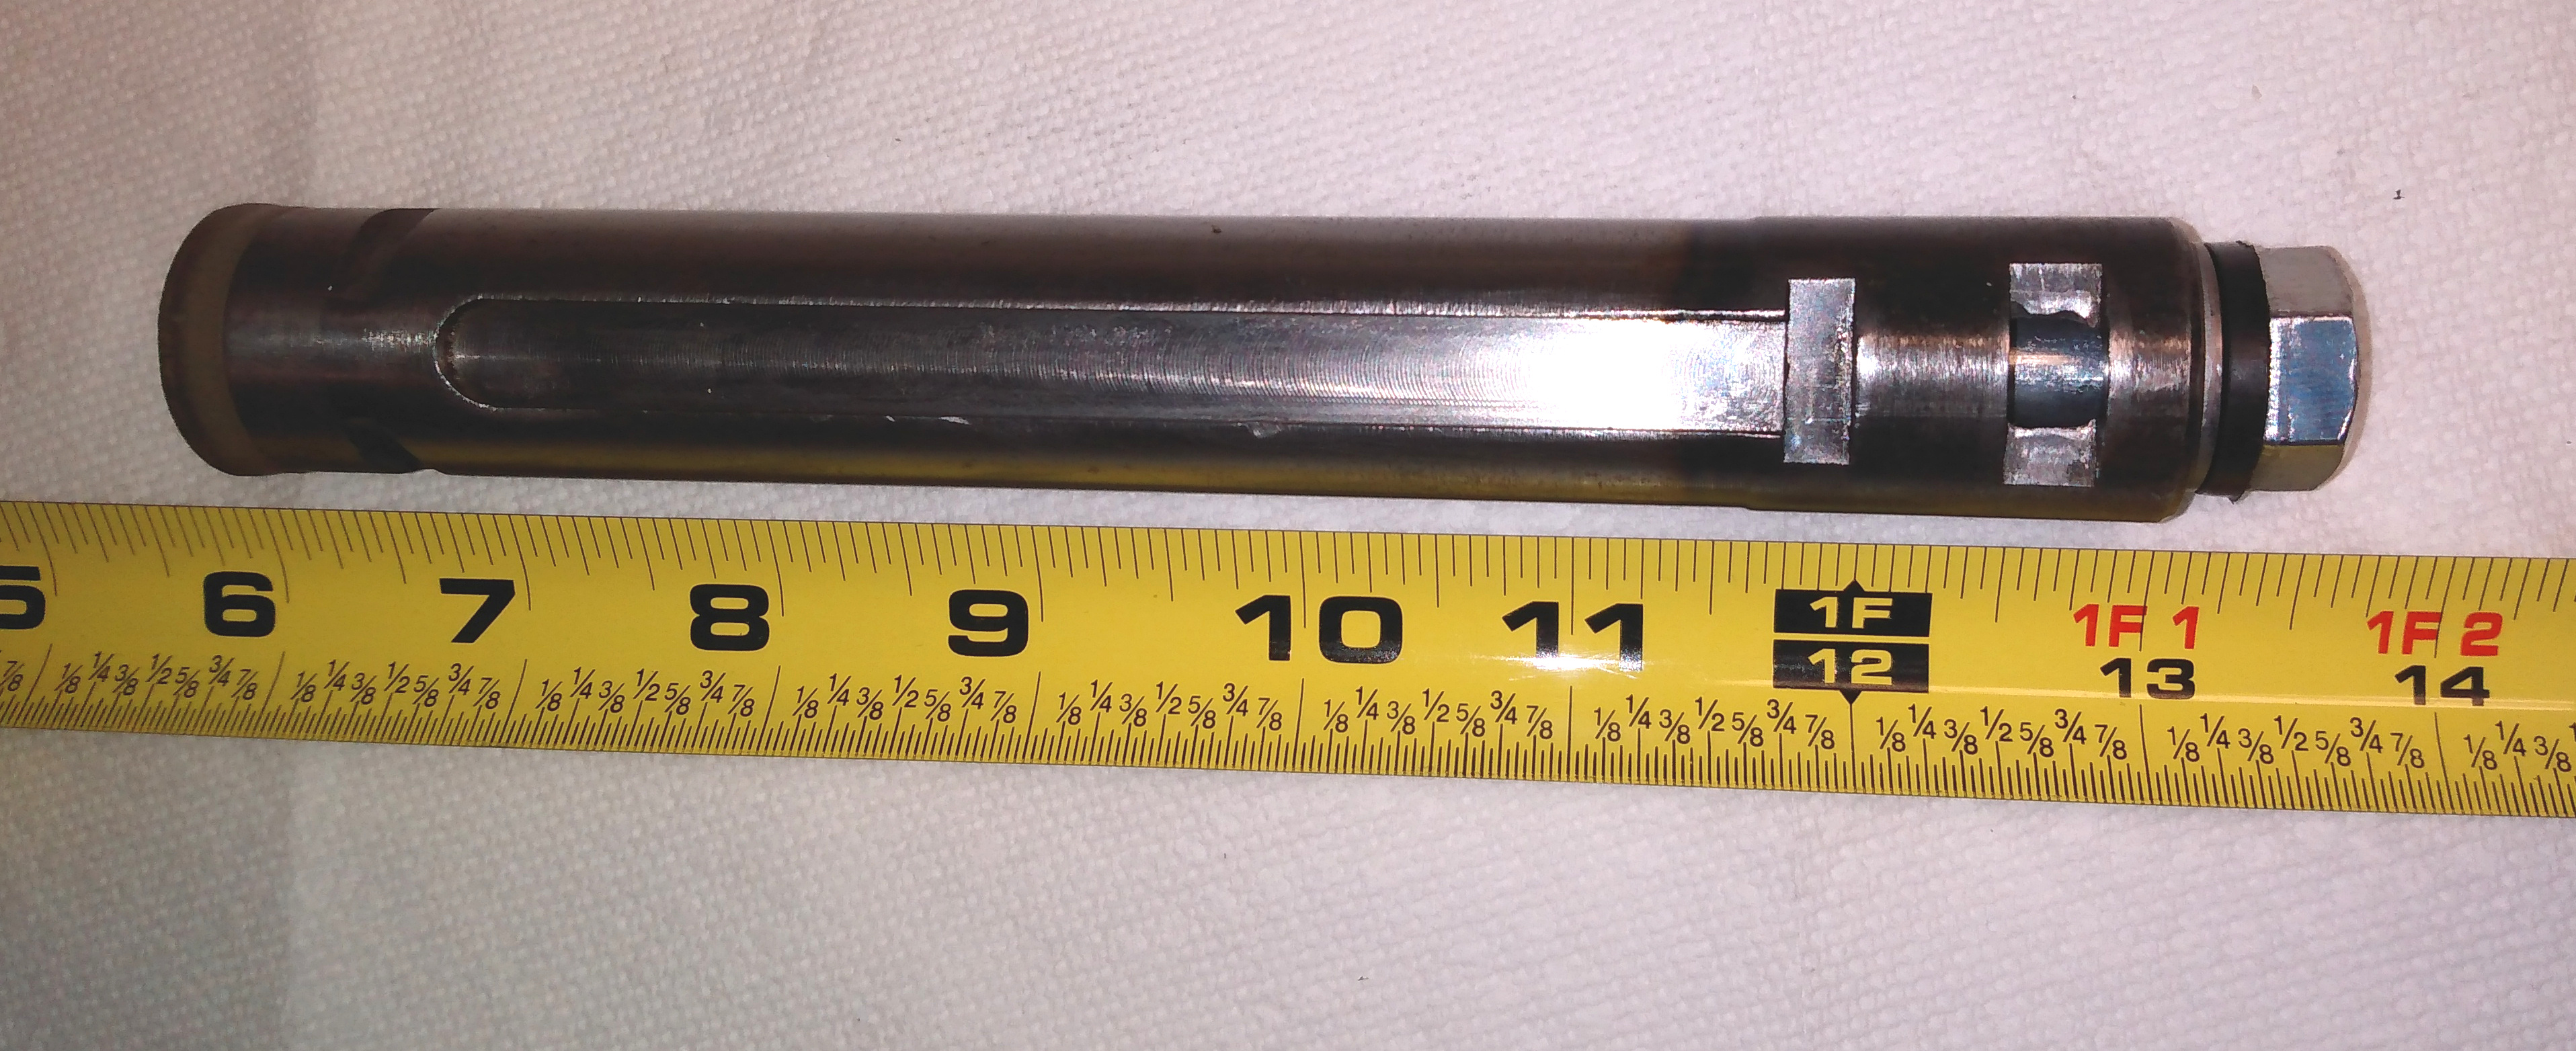
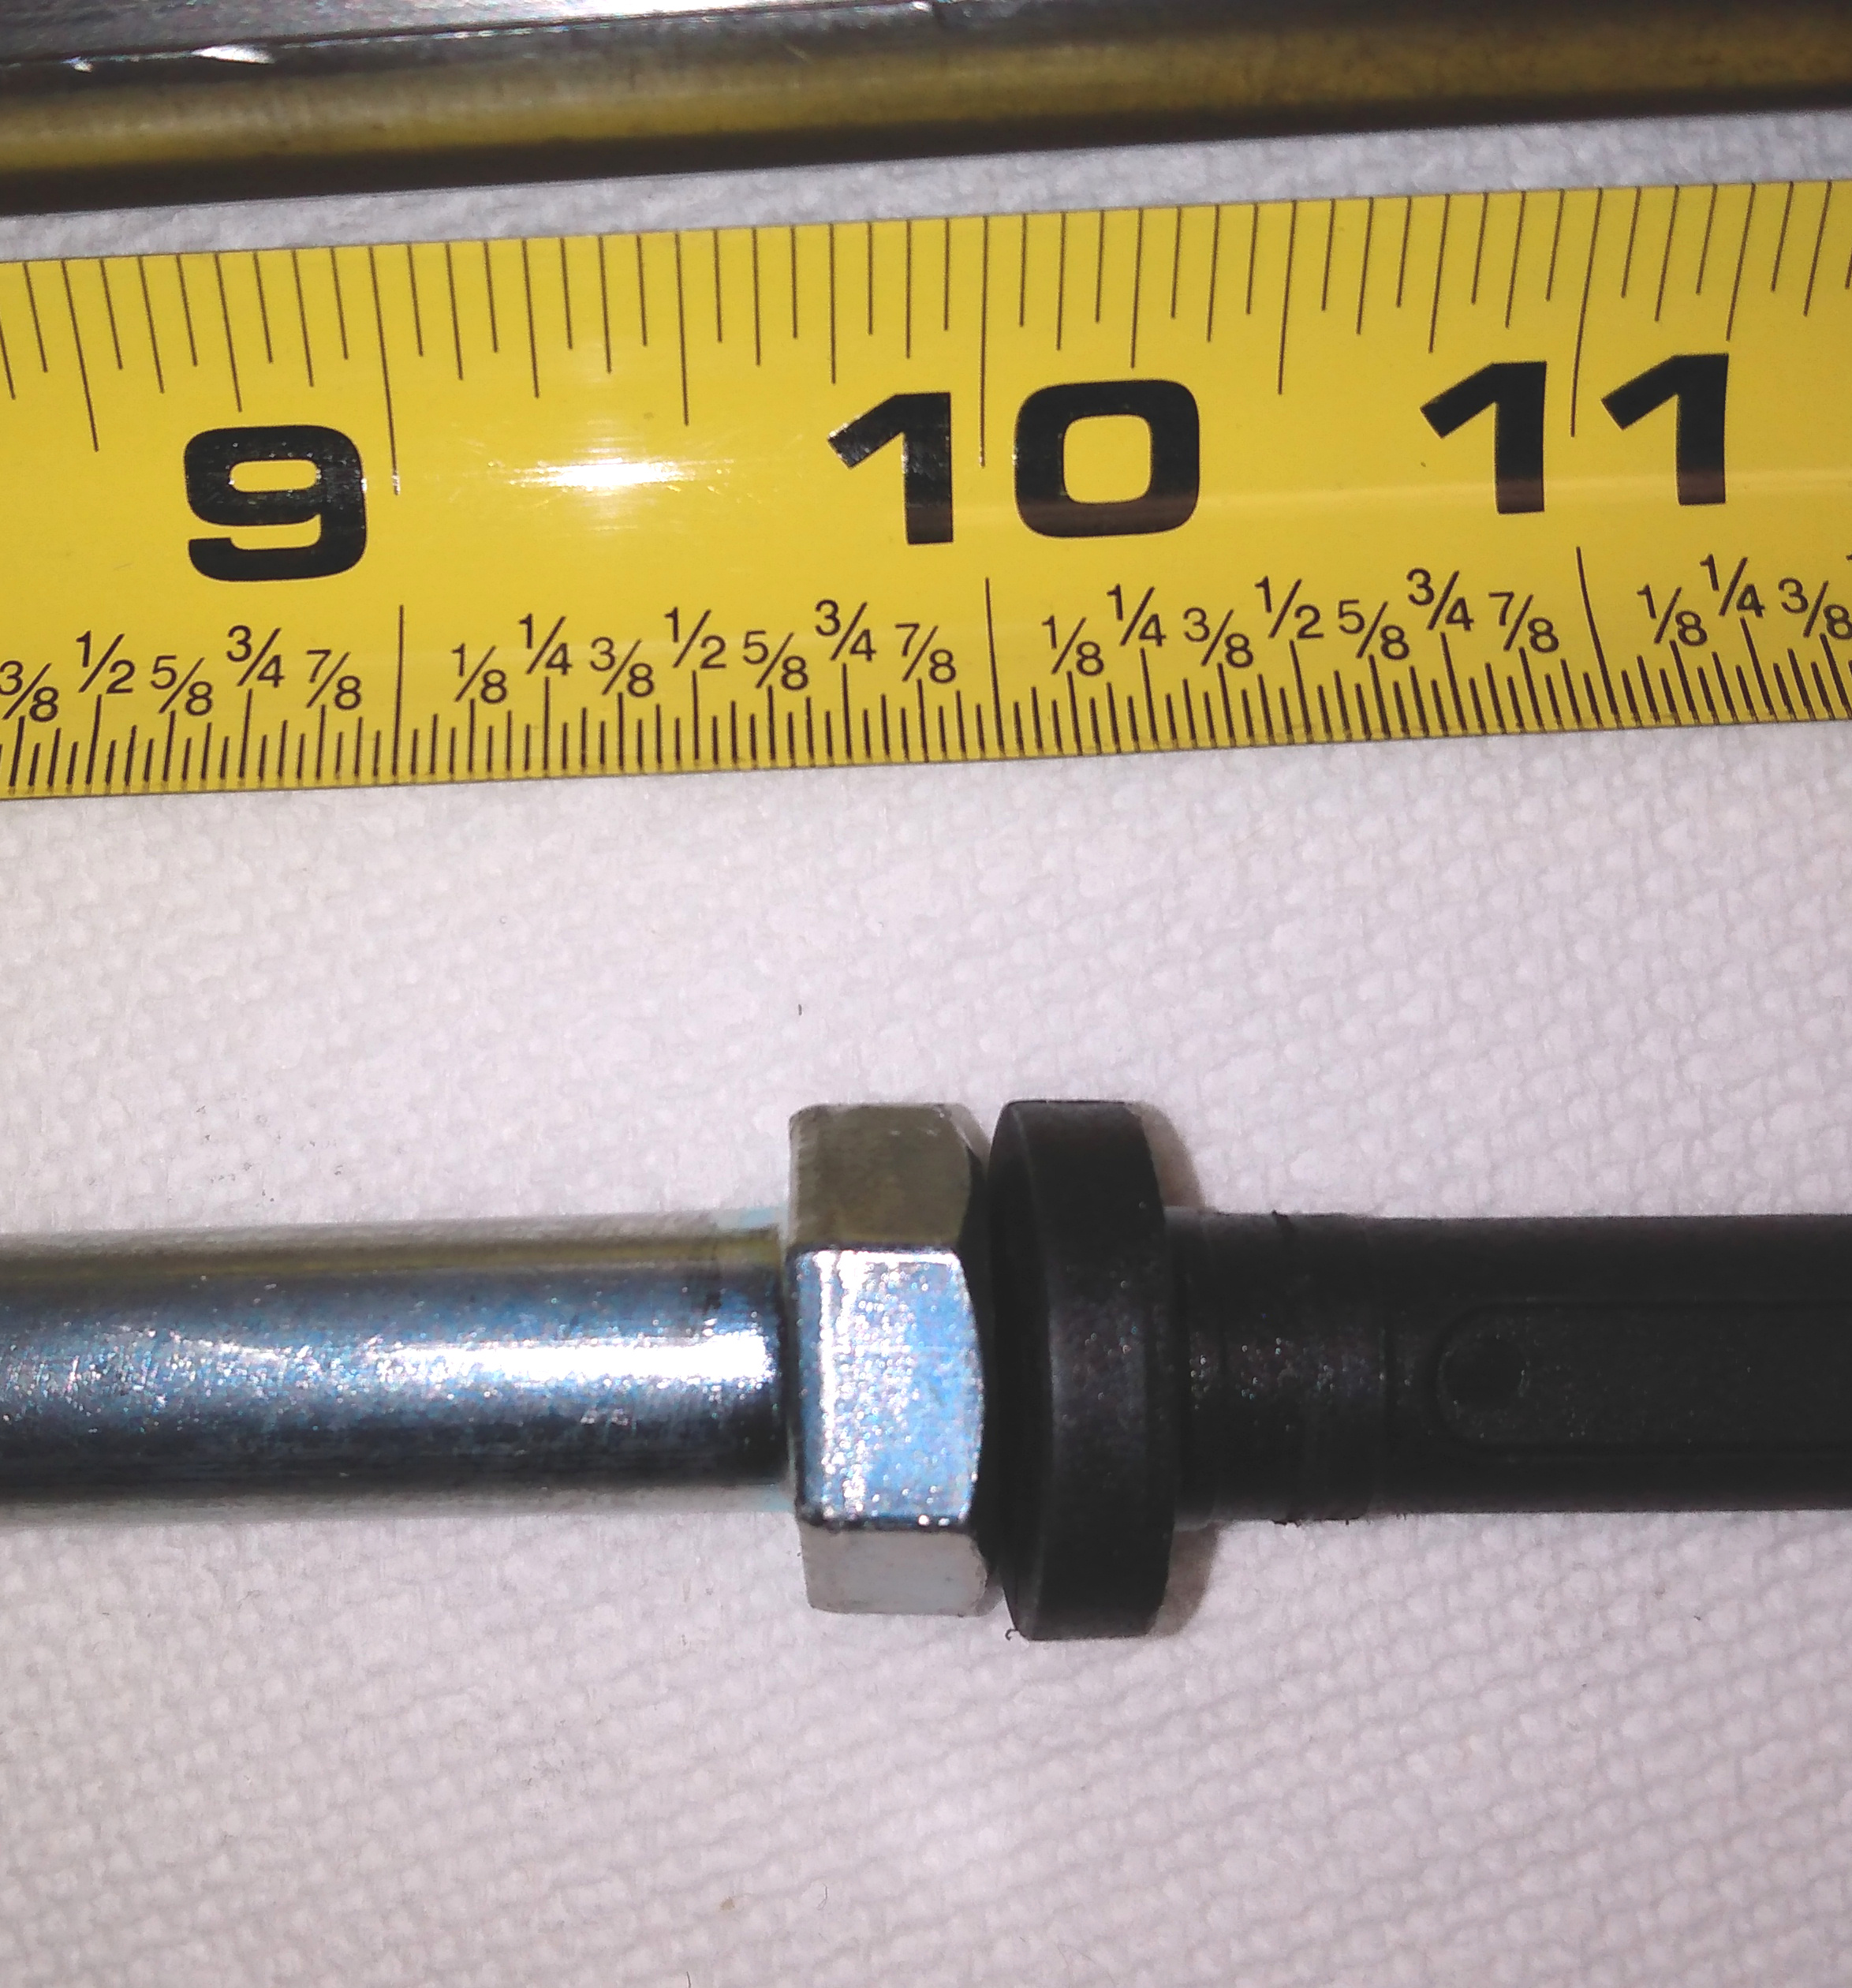
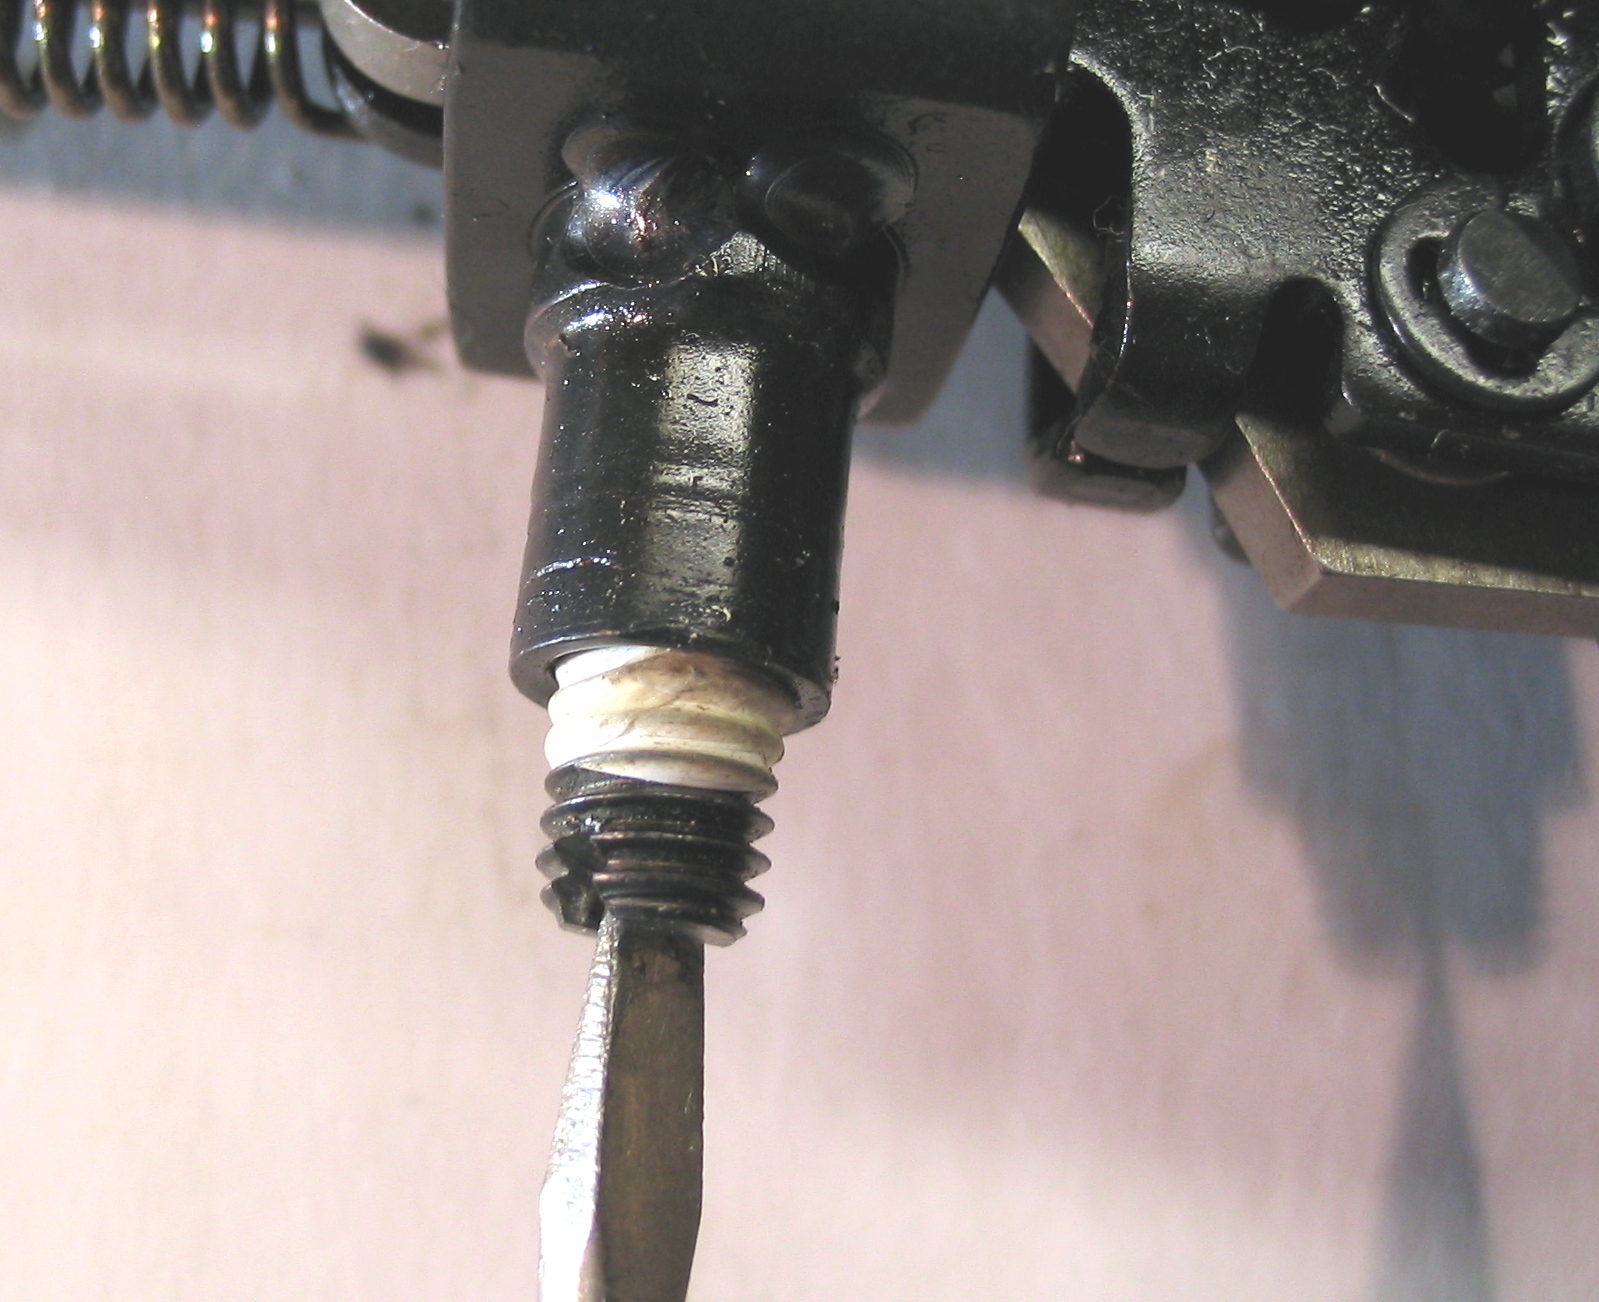
Then I decided to go the against the flow and INCREASE the internal moving mass! I made a new top hat from a 1/2″ hex bolt. Rounded off and polished the hex head and cut it to a length about twice as long as the factory top hat. Double the mass, has an additional 1/8″ preload, AND it fits the spring MUCH BETTER than the really loose factory top-hat. I expected there would be very little difference in the shot cycle. Was hoping the better fit might dampen what little spring vibrations the rifle had and the rifle might shoot heavier pellets slightly better(?). Typically more moving mass is better for heavier pellets.

New Top Hat Modification:

Piston & Seal Weight, 10.7oz, 303g
NEW top Hat, 4oz, 113g
Moving mass (no spring), 14.7oz, 417g

I re-assembled the rifle painting the spring and guides with my preferred coating of sticky marine grease.

Getting the small cross pin back in was difficult in my rifle. Aligning 3 things to get the pin seated took some extra time and effort. You DON’T want to POUND these parts back together! If it won’t go back together with gentle tapping from a small plastic hammer, then reposition and try again!

Getting the trigger assembly back in with the main piston latch in the correct position is difficult. You really need 3 hands, but I got it done.

After the small cross pin is installed (spring compressor is required) the rear plastic safety leaver cap slides right in and the large cross pin (at least on my rifle) slides right in 95% with no need for the spring compressor. Large pin only needed a very light tap to get it 100% seated.

Replaced the safety lever, anti-bear-trap linkage, and trigger blade assembly with relative ease. Re-adjusted the trigger set screw mod back to where I like it, about 0.030″ sear overlap.

Mounted action to stock (describe extra washer mod later) and tried to cock the rifle BEING AWARE that my top-hat might have been too long (unlikely) AND my trigger mod was re-adjusted by SIGHT so trigger might NOT be stable.

Rifle cocked just fine and a few hard bump tests indicated I didn’t have the trigger in an unsafe mode.

Next up, shooting for velocity and accuracy along with any subjective observations about the shot cycle and how it may have changed or not.

2021_10_23_Hatsan_Mod85_spring_177_refurb_mods

What I typically do to twangy springers in general and more specifically some work on a well used Hatsan factory refurbished Mod85″R” spring 177.

1) Inspect new/refurbished air rifle for any obvious defects.

2) Hatsan mod85’s specifically…

2a) Remove butt pad (2 screws) and end plate (2 more screws).
2b) Fill hollow stock with heavy plastic beads (blanket weights) until ~90% full.
2c) Carve a custom fit poly foam (Pyramid Air pellet tin packing foam) plug that will need some slight (not too much) compression when reassembling the stock.
2d) Re-attach end plate (2 screws).
2e) Add butt pad spacers now IF you need them, I prefer adding 2 of the 3 usually included with this air rifle to get my desired LOP.
2f) Re-attach butt pad (2 screws)… hollow stock sound gone, action feels more solid, done with this mod!

3) Clean rifle bore before shooting

4) Shoot rifle at targets and document some baseline accuracy and chronograph data

5) Document OPINION on how the rifle FEELS to shoot

If the air rifle is accurate, shooting close to rated performance specifications, and is a PLEASURE (firm solid thump / no boing) to shoot, I prefer to NOT open it up at this time.
If the air rifle shows any signs of problems… poor accuracy, way off-spec performance, or has a harsh boingy shot cycle, I will tear it apart to find & fix the problem(s).

Cheap custom spring guide for a budget springer.

Let’s be REAL here, my Hatsan Mod85R is an $80 air rifle. If it needs a new/custom spring guide I’m NOT spending much more than $5 for one.

When you spend $500 on a fine German tack driver you can justify the added expense for a professional tune-up and/or a custom spring guide made from some cutting edge (expensive) slippery polymer that is finely machined/lathed within a fraction of a thousandth of inch to the EXACT fit your specific spring.

If that describes your airgun preferences, you may not want to read any further.

What follows is a LOW TECH BUDGET DIY spring guide build for a cheap refurbished springer. Total cost in parts is under $3.

Tear-down time ? YES!

1) Buy a 1/2″ x 8″ hex bolt with PARTIAL threading. Ballpark pricing is around $2. [image 01]

IMG_20211023_01

2) Cut off the threaded portion so that 6.25″ of 1/2″ smooth steel shank remains. [image 02]

IMG_20211023_02

3) Round off the cut end so the spring coils can move smoothly over the guide edge. [image 03] [image 04]

IMG_20211023_03IMG_20211023_04

The Mod85 pistons in my rifles will accept a full 6″ guide (6.25″ – 0.25″ for washers) before the new guide interferes with trigger latch-up.

Piston cannot travel farther than the factory spring guide plus two washers. [image 05]

IMG_20211023_05

My new guide length of 6.25″ bottoms out inside piston at 6.125″. [image 06]

IMG_20211023_06

When I add the 2 factory washers the piston stops at the washes (like normal) so the end of  guide is 0.125″ away from touching the piston (inside) and interfering with normal operation. [image 07]

IMG_20211023_07

This will vary in different springers so it is up to each owner to determine the maximum allowable length of the spring guide for THEIR particular air rifle.

4) Locate the center of the HEX end and carefully drill a 3/8″ hole to the depth of the HEX head. [image 10] [image 11]

5) With the bolt still spinning in the lathe/drill press, cut off part of the thickness of the HEX head to match the thickness of the factory plastic spring guide. [image 09] [image 12] [image 13]

IMG_20211023_09IMG_20211023_12IMG_20211023_13

For my Hatsan Mod85 springs the diameter of the stock 1/2″ bolts I have are a REALLY SNUG fit into the completely RELAXED spring. This is EXACTLY what I want! By the time the spring is compressed to its NORMAL PRELOAD length inside the rifle (3 full inches of preload), the guide fit will relax to just snug. I WANT just snug at that point so there is a little friction between the guide and the spring as the shot cycle ENDS. THIS FRICTION is what dampens the longitudinal spring vibrations and makes the rifle shot cycle FEEL vibration free.

6) Transfer the factory steel and polymer washers to the newly created spring guide. [image 14]

IMG_20211023_14

There is a 1″ gap between the end of the guide and the beginning of the piston skirt. After 3″ of preload compression there is NO length of unsupported spring.

It is possible the 2 washers may NOT FIT the larger/longer new guide (my DIY Mod125/135 guides require this step).

I use a small sanding drum on a dremel tool and slowly/carefully sand the ID of the 2 washers until they slide onto the new guide with minimal effort.

7) My preference is to lightly paint the new guide and spring with some tacky marine grease, maybe mixed with a little moly paste, prior to reassembly.

8) Assemble the guide into the spring and RE-PAINT the grease/moly mix.

9) Re-assemble the rifle and attempt to cock it to full trigger latch.

If you cannot achieve full trigger latch then the guide or the HEX head portion of the guide may be too large for your rifle.

You will need to disassemble and carefully measure your internal parts to see where the interference is occurring and then make the appropriate modifications to the new guide so that it WILL work in your rifle.

If the rifle cocks just fine, load a pellet and start shredding targets.

After a lube-tune-newparts rebuild I always get a little dieseling. I’ll typically send 20-50 pellets down range until I feel the rifle has settled down before I start logging chronograph data and testing for accuracy/consistency.

I can usually feel the rifle shot cycle has greatly improved IMMEDIATELY so that shooting it is FUN (not painful). That alone is worth the effort. Sometimes I measure a small decrease in muzzle energy after a tune-up. That NEVER bothers me as I’ll happily trade a little muzzle energy for a smoother shot cycle.

This particular Mod85 refurbished air rifle arrived from Hatsan shooting:

Winchester/Daisy* HP 9.7 grain pellets, 10 shots, 788 fps avg at 30′, ES=37, SD=13, shot cycle a little rough with lots of dry spring vibration (twang) after each shot. Ten shot groups at 30′ using open sights measured 0.6″

After the cleaning, relube, and adding new spring guide:

Winchester/Daisy* HP 9.7 grain pellets, 10 shots, 790 fps avg at 30′, ES=22, SD=6, shot cycle a nice firm THUMP with no spring vibrations at all after each shot. Ten shot groups at 30′ using open sights measured 0.6″

I did not lose any pellet energy installing this particular custom spring guide. Accuracy at 30′ didn’t change and the shooter (me) is still the weak link. The goal of this tune-up was to make a bargain air rifle “fun” to shoot and that goal was achieved.

*Yes, these are from the old black/yellow print tins made in China (no longer available) and I weighed them at 9.7 grains average. I also have the currently available black/white print tins from Spain, but those pellets weigh in around 7.8 grains.

Good luck with your air rifle projects!

2020_02_23_Hatsan_Mod125_spring_25_refurb

I recently picked up a cheap refurbished Mod125 spring 25 cal from Field Supply. My past experience with Hatsan refurbs from F.S. has been consistently below average (as received). This one follows that trend.

I’ve had several refurbished rifles from F.S. that seem to be their customer returns that have NOT gone back through Hatsan. I’m actually OK with this as the prices are LOW and my plan was always to completely tear down these rifles for my own preferred rebuild tweaks. The results AFTER my repairs have always been very good so I’m not disappointed with any of these purchases.

The rifle box had the inspection ticket from a Hatsan technician that verified normal function and the velocity test check was ~710 fps. I don’t doubt this was true when it left Hatsan, but I’m certain someone has put some additional mileage on this rifle after its last factory checkup. The rifle I received had a really HARSH shot cycle with tons of spring T-W-A-N-G. Pellet velocities were randomly going from 400fps to 600fps for the 20 grain H&N FTT. Not even close to what I would expect from a proper functioning Mod125.

After less than a dozen shots I had more than enough twang for one day.

Tear down time!

Rear stock screw threads were badly damaged. Most likely by a burr on the slotted inner post. Discarded the bad screw and chased the threads on the inner post. No more burr and a new socket head cap screw ready to secure stock when repairs are complete.

Spring was very dry. Piston seal face was scorched and had a chunk missing from the lip. It also had what looked like a split down the side. It wasn’t a split. It was a thin burnt erosion channel from super-heated air bypassing the side of the seal. Obviously the seal was bad and needed replacement.

I cleaned up everything, deburred a lot of sharp edges and replaced the bad piston seal with a new one. When I tested the spring guide fit I noticed it was quite loose. I also noticed how SHORT it was. I decided this was a good time to test a possible improvement I’ve been wanting to try.

When I first shot the rifle and felt how harsh the shot cycle was, I noticed there was a lot of unsupported spring visible through the cocking slot. My thought was that a snug fitting spring guide that was much longer might improve the shot cycle. I wanted to make the guide as LONG as possible yet still allow full piston travel and reliable cocking. I took some measurements and calculated that a 7″ guide should fit. For comparison, the factory guide is 3.75″ long.

With the new guide the spring is either supported by the ID of the piston, the OD of the new guide, or BOTH! No part of the spring is ever unsupported. That has to reduce spring vibration to near zero. At least that was my theory.

What material to make the new guide from? Everyone seems to prefer one of the stronger slippery polymers. I would too… if I had that material and a good lathe. What I do have is a big metal scrap bin and a cheap (but awesome) Chinese TIG welder.

I chose 1/4″ black steel sch40 pipe. Its normal OD is a tiny bit too large for the ID of this Hatsan spring, but that’s perfect! I just chucked it up in my drill press and hand filed/sanded the pipe OD for a few minutes until it was a nice SNUG fit into the spring. I TIG welded a couple 3/8″ steel washers together and then welded the pair to one end of the pipe. New guide done. That was almost too easy!

IMG_3473a


IMG_3476a

IMG_3478a

IMG_3480a

I did move the factory polymer and steel washers from the original plastic guide to the custom steel guide to maintain the same spring preload.

I applied my preferred thin coat of MOLY paste to the compression tube and piston bearing surfaces. Then brushed my favorite tacky marine grease on the guide and spring. Reassembled the rifle and made a slight tuning adjustment to the Quattro trigger. Then carefully cocked the rifle to verify the new guide wasn’t interfering with normal operation.

No detonations, but did get the little wisp of smoke on the first 2 shots after the rebuild. That’s the tiny bit of MOLY carrier (mineral oil) burning off. Then I started shooting over the chronograph. Average was ~720 fps for the 20 grain H&N FTT. That’s a little low for this rifle but I think the spring has some mileage on it AND my new guide may be snug enough to rob a little spring energy. I’m hoping this will improve a little as the new guide breaks-in. Accuracy was immediately dimes at 30′ with open sights.

During the cocking stroke you can feel the slight vibrations of the coil spring compressing. This is normal for most coil spring rifles. That vibration is absent on a Vortex air spring model where the cocking stroke is perfectly smooth.

What was a surprise to me was how much the shot cycle improved. I KNOW this is a coil spring rifle when I cock it, but it SHOOTS like it has the Vortex air spring! The shot cycle is a short impressive THUMP with NO indication there is a coil spring inside.

So once again F.S. supplied me a gem in the rough. I just needed to polish the gem to see it shine. I’m very happy with this rifle after its tune-up.

Sadly, anyone else receiving a Hatsan rifle in this condition would have probably returned it and NEVER purchased another Hatsan rifle… ever!

2020_02_09_Hatsan_Edge_Trigger_Blade

I recently scored a new Hatsan Edge 22 MG-Camo Combo (with scope) for $56. Planning to gift it to a friend hoping it will generate some more interest in the airgun hobby. Of course I have to thoroughly check it out before it goes anywhere.

I’m used to unboxing refurbished Hatsan air rifles and most of those shoot pretty poorly as received. This new Edge was shooting shockingly well right out of the box! Really smooth shot cycle with a nice THUMP and zero spring twang. I thought they shipped me a Vortex air spring version at first, but I can see the coil spring.

Always present and usually not adjusted well is that low end Hatsan trigger with the big hook and LONG travel to an uncertain release. Fixed the travel easy enough with an 8mm long adjustment screw instead of the factory 5mm length. That provided a long but light pseudo first stage to a very detectable sear lever contact point (pseudo second stage stop). Then a short crisp snap to fire. These simple triggers can be made really nice with just a little fine tuning!

Was very happy with the performance of rifle and proceeded to check the accuracy. CPHP 14.3 grain pellets were providing dime groups at 30′ with the open sights. Had an occasional flyer, but I get that pretty consistently with other air rifles and am convinced it is the sloppy tolerances of the retail CPHP tins. Loose breach fit and slow chronograph readings usually correlate with the flyers so I think this rifle is a keeper, I mean suitable for gifting 😉

After about 100 pellets my trigger finger started to hurt. It only does that on those extra curvy Edge trigger blades! These blades seem to be designed for people with wire hooks for fingers(?). It is uncomfortable at the start of pull and pinches near release. There is just no reason for a trigger blade to have that deep a hook shape to it! Time to fix the problem permanently.

Carved out a few hours of time to work on a trigger blade bending fixture I’ve been wanting to build for many months. I’ve complained about the excessive curve on the Hatsan Edge trigger blade before, but never really had a practical solution. An impractical solution was to custom make a whole new trigger blade from scratch. That worked quite well, but I can’t spend 6+ hours per custom trigger blade for every Edge variant on my rack.

Printed out my scale drawing to use as a template.

edge_blade_mod_drawing

Found a piece of steel plate in my metal scrap box and chopped it into 3 pieces. Drilled one locating hole through all 3 pieces. Then cut one of the 3 pieces into a close approximation of the trigger blade profile I wanted. That cut was a little tricky, but I found a way.  Trigger below has already been “straightened”.

20200209_142814_sm

A little grinder shaping and sanding to smooth out the sharp edges and it was ready for its first customer. My idea was to lube everything with a thin coat of grease, sandwich the Edge trigger blade in the fixture plates, and then use my hydraulic press to UN-bend that curvy trigger blade.

As you can see from the photos, it works exactly like I planned. The hydraulic press is probably overkill. Another c-clamp might be able do the same job. Washers in the photos are just free floating spacers, the same thickness as the trigger blade metal, used to maintain alignment when all the parts are clamped together.

20200209_143414_sm

The straighter trigger blade length does interfere with the trigger guard so I do have to sand/grind away about 1/8″ off the tip. That’s easy and the hardest part of the process.

Stock curvy trigger blade compared to my preferred straighter trigger blade.

stock_edge_trigger_blade

20200209_straightened_shortened_trigger_blade_installed

Now it takes about 3 minutes to straighten an Edge trigger blade and the fixture plates ensure that all of my modified blades will have the exact same shape that I want.

2020_01_12_Beeman_Black_Cub_Youth_Air_Rifle_Combo

Review of the Beeman Black Cub “1022” youth air rifle.

2020_01_12_Beeman_Black_Cub_box

2020_01_12_beeman_black_cub_combo_1022

Purchased at Walmart on 01/10/20 for $45 “Clearance”.

This is a break barrel spring piston powered air rifle sized for younger shooters. Comes with both a 177 and a 22 caliber barrel and a scope.

***************
Spoiler Alert!

DO NOT BUY THIS RIFLE if you must have an adjustable light crisp trigger action!

Summary… IMHO a good value youth springer package in the 10 fpe range…  IF you can get it for $45 OR LESS!
***************

Open sights on this rifle are surprisingly good. Front sight does NOT block my target sight-line. The rear adjustable sight requires the use of a small flat blade screwdriver to loosen locking screws for elevation and windage adjustment. The sight elements are manually slid along mini dovetail rails until zero is achieved. I think this is actually better than many of the “spring loaded” sights provided on other low cost air guns.

There is noticeable barrel droop on my rifle and I suspect sighting-in the included scope will be very difficult. I’m not going to shoot this rifle with the scope so that will NOT be part of this review.

Visual inspection revealed a VERY DIRTY bore, so first step was barrel cleaning. Needed only 3 wet patches and 2 dry ones, but that FIRST patch came out black pushing some particulate matter that felt like fine SAND. Have never seen that in a barrel before today. Shooting pellets prior to cleaning the barrel on this rifle would have damaged the rifling.

My rifles forearm screws (#2 philips) and rear stock screw (#3 philips) were loose with no signs of any thread locker compound. CHECK these screws before you shoot this rifle and check them AGAIN every 20-30 pellets. They are going to come loose until a good thread-locking glue is applied and allowed to cure.

Length of pull measured 14.25″ and rifle with 177 barrel and NO scope weight is 5.5 lbs. The stock feels good but there is that hollow butt resonance in my EAR that will need some damping. More on that later.

2020_01_12_hollow_grip_storage


There is a screw cap on the grip that reveals a small hollow “storage” area. Good place for some back-up pellets or maybe survival matches? Cocking effort is light compared to “adult” springers and is smooth up to the very last inch. The little “crunchiness” I feel at the end is the auto safety being engaged.

There is a very simple anti-bear-trap mechanism in place so you cannot normally pull the trigger to de-cock this rifle.

2020_01_12_trigger_safety

The safety button is in an unusual place. It looks an endcap “pin” that has slid out of position. Pushed from the LEFT side to the RIGHT to fire, it initially felt really awkward to use. After about 10 minutes I found myself going from safe to fire with little effort or thought. Once you get accustomed to the mechanism it just becomes “muscle memory” to disengage the safety.

2020_01_12_single_stage_direct_sear_trigger

Trigger pull is heavy, long, and creepy. I was pretty certain this felt like a single stage direct sear trigger (non-adjustable) and I later confirmed that by removing the action from the stock. If you must have a light crisp trigger…

***** DO NOT BUY THIS RIFLE! *****

Started shooting some Crosman dome 10.5 grain pellets. First 6 shots were “smokin” at over 800 fps through the chronograph at 30′ ! The large lingering cloud of acrid burnt oil smoke that started to haze up my range was a pretty obvious indicator of some significant diesel action. Most of the factory lube “fuel tank” was gone by shot 10 , but the eye and lung irritation lasted a few hours. The Crosman domes settled down to about 660 fps (10 fpe) at 30′, which is what I was hoping/expecting to see from this rifle.

Grouping on target was a mediocre 1.5″, but this is a new rifle and only the first pellet type I tried.

202_01_12_ten_shot_group

Next up, some cheap ($3.19/500) 7.8 grain Daisy wadcutters. They averaged 770 fps (10 fpe) at 30′. POI changed by a couple inches so I used a few shots to re-adjust the sights. I put the next 8/10 wadcutters into a tight 0.36″ group at 30′. That’s when I realized I was going to keep this rifle. A couple flyers stretched the group to 0.68″, but I believe those were my fault. The hard trigger requires perfect shooting technique and I didn’t do my part.

The shot cycle is mild compared to a 20 fpe springer, but it has some harshness and significant spring “twang”. There is still also a wisp of oil-smoke in the barrel so some factory lube dieseling is still present. I think the shot cycle could become a nice smooth “thump” with a little de-re-lube and tune-up work.

2020_01_12_muzzle_view

Muzzle view shows better than average finish and crown. Crown could look better but I don’t think further polishing will help. Accuracy seems to be limited by shooter skill and not the rifle itself.

The 7 lb direct sear trigger will be the biggest problem for many people. I have experience shooting direct sear triggers on the low-end Norica springers, so this trigger is not new to me. I do prefer a 2-stage 2-3 lb trigger whenever possible, but can accept and shoot a stiffer single stage trigger on hunting and plinking rifles. It just takes me a couple dozen pellets to get used to the different triggers. Since I can still shoot good groups even with the rough trigger, this rifle is a keeper for me.

Next steps…

>Fill hollow butt stock with some poly pellets and foam to dampen sound and vibrations.
> Disassemble action to clean out factory lube.
> Deburr, polish, and re-lube power-plant.
> Modify and/or add spring guide components to help smooth the action.
> LIGHTLY polish and moly lube direct sear trigger parts. This doesn’t lighten the trigger pull, but it can make the trigger feel LESS creepy.
> CLEAN and shoot the 22 barrel.

That’s all for today 🙂

2019_08_04_Daisy_Winchester_1100s_trigger_mods

Brand new air rifle from Amazon at a silly low $29. Cleaned the barrel with 2 wet patches and 2 dry patches. This barrel was as clean as the $59 Walmart version I picked up several months ago.

Only first shot detonated, then rifle calmed right down. Put about 20 shots on target, then removed stock to work on trigger.

I already had a bag of M6 socket head cap screws. Instead of buying more, I decided to just shorten a few and use the cutoffs in the (Daisy) Winchester 1100s trigger. The remnants are about right length if I need to replace any of the factory 1100s stock screws.


The stock screw in my rifle does not interfere with the new sear adjustment screw. If you go longer than 9mm, the stock screw may bottom out on the adjustment screw.

Punched out some spacer washers to remove side-to-side play in the trigger blade. Used HDPE bleach jug material and some hole punches. Material thickness was almost perfect at 0.033″. You could also use 2x 0.016″ thick spacers, but perfectly centering the trigger blade didn’t seem necessary.

07_hdpe_spacer_washers_punched_033inch_thick

Pulled out the trigger blade for a little rework. One sharp edge rotates/rides along first sear lever and gives the trigger a “gritty” feel. Rounded that edge with fine file and then sanded/polished with 1500 wet/dry sandpaper. Coated newly formed edge with a little moly paste before re-assembly.


Stock trigger blade spring is made from 0.047″ wire and I think it is a little too stiff. Wound some “new” springs with some 0.029″ Full Hard Temper Steel Spring Wire using a piece of 5/32″ welding rod as a form. A 1/4″ long piece of that welding rod also makes a useful dummy pin to help keep spring in position during re-assembly.


Installed modified trigger blade with new spring and white plastic spacer.

14_trigger_blade_installed_with_spacer

Wrapped some teflon tape around sear preload screw to make a snug fit. Once adjusted, a drop or two of thread locker would probably work better at keeping the screw from moving on its own. I adjusted the screw by sight to get about 0.030″ sear overlap when rifle is cocked.

15_sear_preload_screw_started

Adjusting the screw “in” until the rifle FIRES, then backing out the adjustment screw a  number of turns should also work. I did not use that method so cannot suggest the correct number of turns to “back off” the screw. Whatever method you choose, PLEASE be very careful and bump test your rifle to verify that you have a safe and stable trigger after these changes.

Trigger now has a long but very light first stage that hits an obvious second stage wall. This wall is where the trigger blade begins to move the primary sear. Second stage to fire is smooth and my spring (non-digital) trigger scale says average force needed to fire is about 3lbs.

A quick ten shot group to test the feel of the modified trigger. Open sights at 30′, standing with an elbow rest. I use that hold because I can usually replicate it when in different positions (seated & kneeling) and when hunting using trees and branches.

16_ten_shots_30ft_opensights

Not perfect, but darn good for a $29 break barrel air rifle!

This air rifle only has about 40 pellets through it so I expect groupings to improve as rifle breaks-in.


Good Luck!

eof


2019_07_14_Hatsan_Mod95spring_22_refurb

Hatsan Mod95 22 Spring Refurb – review & rework (long)

In my experience some refurbs need a bit more work than others. I enjoy working on these “project” rifles as much as shooting them and don’t return them unless I get one with a “bad” barrel.

I classify break barrels as a “nice shooters” when the rifle:

  • -“feels” comfortable, has good balance, proper LOP, ergonomic trigger position, and sight-line is attained quickly and easily when rifle is first shouldered.
  • -shot cycle is a solid “thump” with no harsh shocks or loud twangy vibrations.
  • -trigger action has a light first stage with a crisp short second stage. First stage length is not important to me as long as the transition to second stage wall is easily felt.
  • -shoots nickel size or better 10 shot groups at 30′ with the stock open sights.

I already have a Mod95 Vortex QE-.22 refurb that required a lot of work, but is now a really “nice shooter”.

I’ve been trying to NOT get that same rifle in non-QE, non-Vortex (no suppressor = longer barrel, no gas spring = metal coil spring), but willpower failed and my refurb Mod95 Spring- .22 arrived from Hatsan last week.

No scope included with most Hatsan refurbs. Normally supplied scope has a poor survival record so no scope at this price (~$80) is OK. There are a couple small finish defects on the Walnut stock, but that is normal and explained very clearly on the Hatsan website. Not a problem for me. Checked the stock screws first as normal. Front SAS screw was tight, but rear stock screw was loose. I started to tighten it, but it felt like I was crushing the Walnut so I just stopped at snug. Cleaned the barrel and shot a few rounds over the chronograph. Average 770fps with the CPHP 14.3 grain.

Shot cycle was a little harsh and there was a bit of a “ping” sound that other people have described hearing on the Vortex versions. Since this is the spring version, my ping is not from the Vortex. I suspect it comes from the SAS suspension system. More on that after the clean & lube.

There was also a little “grittiness” during the cocking cycle which I thought might be from a very dry looking mainspring.

I’ve never had to adjust any of my other Quattro triggers before, but this one felt like it needed a little tweaking. Problem was that both front screws were bottomed out as received and the second stage travel was still longer than I normally prefer.

Groups were good right out of the box with 9/10 shots inside a nickel at 30′ using the factory open sights. The occasional flyers were “my” fault as I lost concentration a few times thinking about how the trigger (and that rear stock screw) didn’t feel right.

Tear down for clean, lube, and trigger adjustment…

Pulled Quattro trigger group first. Noticed it was very dry with some crusty chunks of grease(?). Cleaned trigger group but made no changes to any internal parts. Lightly relubed all trigger parts with a synthetic oil, then pulled the trigger blade out to inspect the two front adjustment screws.

The screw tips were nicely rounded, but the length was just a hair short of getting the adjustment I wanted. Instead of using longer screws, I just carefully filed about 0.020″ (1/2mm) off the trigger blade under the head of each screw. This doesn’t seem like much, but it gave me the prefect range of adjustment I wanted. Now when both screws are “bottomed out” the trigger is just a bit too light for my preference. About 1/4-1/2 turn “out” for both screws provides the desired trigger “feel”. I could see the sear overlap was about 0.030″ and bump testing confirmed trigger was stable.

Used a spring compressor to safely remove end cap and decompress the long spring which was very dry and crusty. Cleaned and lubed spring & guide with my preferred thick & stringy marine grease.

Pulled piston. Seal was in good condition. Cleaned piston well and lubed front and rear bearing ends of piston with a very thin coat of moly paste.

Deburred and cleaned compression tube. Applied a very thin coat of moly paste to inside of compression tube and installed piston and spring.

End cap has a safety thumb-switch with a spring-ball-bearing detent. The spring-ball-bearing was not properly installed as received, so I corrected that and added a drop of oil.

Reassembled the trigger group into the action.

When assembling the action into the stock I noticed two abnormal things. First was that the SAS plastic bushing was VERY loose and would easily fall out of its hole. I have taken apart many SAS rifles before and have never seen this bushing fall out. Usually it is a tight fit. I think this may be related to the “ping” sound some have on their SAS Vortex rifles. I shimmed the bushing to provide a tight fit.

Second issue was at the rear stock bolt. There appeared to be a small milling error defect in my Walnut stock inlet. Only half of the wood supported the screw mount stress because the other half was milled too deep. The remaining support wood area was too small for proper support. When the rear screw was tightened past “snug”, the wood compressed and the action was pulled too deeply into the stock. This pinched and seized the thumb safety. Rifle would still cock, but the thumb force needed to go from safe to fire was (painfully) high.

I cut and shaped a small piece of maple hardwood to fill the milling error and more fully support the rear screw mount. This is not visible when the rifle is assembled so wood color/grain matching is not needed. Also added a thin steel washer on top of the maple patch to help distribute the crush load. The rear screw can now be tightened securely (gorilla tight) with no indication that I’m crushing any wood. The thumb safety now operates as it should with minimal effort and secure detent on/off positions.

The first 6 shots dieseled as expected. The moly paste I use is “mostly moly” and very thick, but it does contain a small amount of mineral oil so it can be squeezed out of the tube.

Chronograph indicated average 760fps after the initial dieseling. This small fps reduction could just be measurement variability or maybe my spring grease is absorbing a little energy? Don’t really care since the shot cycle is now the simple thump I prefer. Uncertain if the “ping” was caused by the loose SAS bushing or the dry spring, but it is now gone.

Accuracy is about the same except no more distracted-shooter-error flyers. The rifle is NOW a “nice shooter”. Sub-nickle 10 shot group at 30′ using CPHP 14.3 grain and open sights.
2019_07_14_mod95spring22refurb_cphp

Comparing the non-suppressed spring to the Vortex QE version for this specific rifle & caliber (both shooting .22 pellets just under 800fps) I’d say that there is no difference in sound level. Once properly cleaned, lubed, and adjusted, the shot cycle difference between the metal spring and the air spring is very small. If you blindfolded me and handed me these cocked and ready-to-shoot rifles, I doubt I could tell the difference between them.

I know there are people who don’t like break barrels because they can’t put pellets accurately and repeatedly through the same hole at 30 yards. I can’t either. That’s why I also have a PCP rifle. Break barrels work for me at 10-20 yard ranges providing ~1/2″-3/4″ groups. That’s good enough and why break barrels will never “die” for me.